In my previous post, I walked through the configuration of the standard, “free” features of the Sales Insights offering for D365 Sales. This time, I am going to start on the premium features covered by the £37.70 per month license fee.
If you look at the Sales Insights administration screen, the list of the capabilities is quite hefty. For this post, I will concentrate on the Assistant, Sales Insights cards and prioritising them.
To get going, hit the Try Sales Insights button. This launches the screen below. Read and agree to the terms and hit continue.

Once done, you are presented with the install screen.

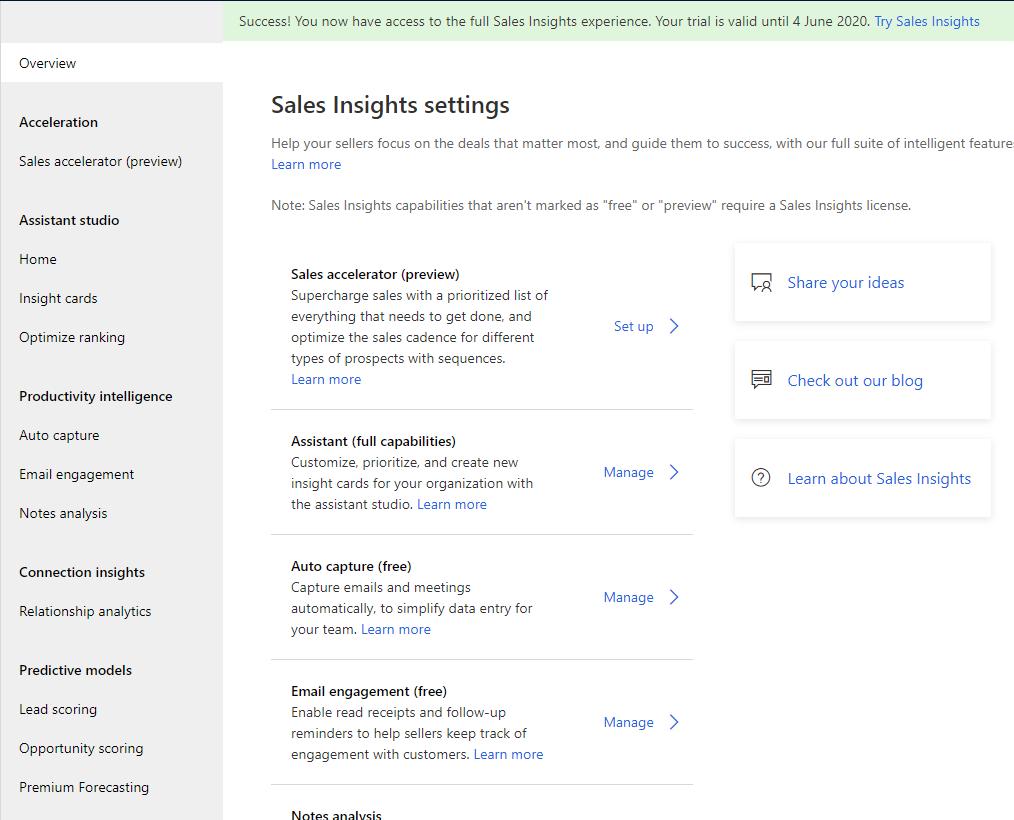
Once installation is complete, a message appears and the Go to Configuration is now available. This button takes the user to the Sales Insights Settings portion of the application.

As you can see there is a lot more settings available to the administrator now. Lets start with the Insight Cards available in the Assistant Studio.
Assistant Studio
The advanced Assistant Studio is a separate display than the “free” version I mentioned on previous post.

The first thing you will notice is the ability to make your own. This utilises Power Automate (and from there, you could rule the world) to define a schedule or trigger to run and produce a card for display.

Each Insight card has a security role selection now.
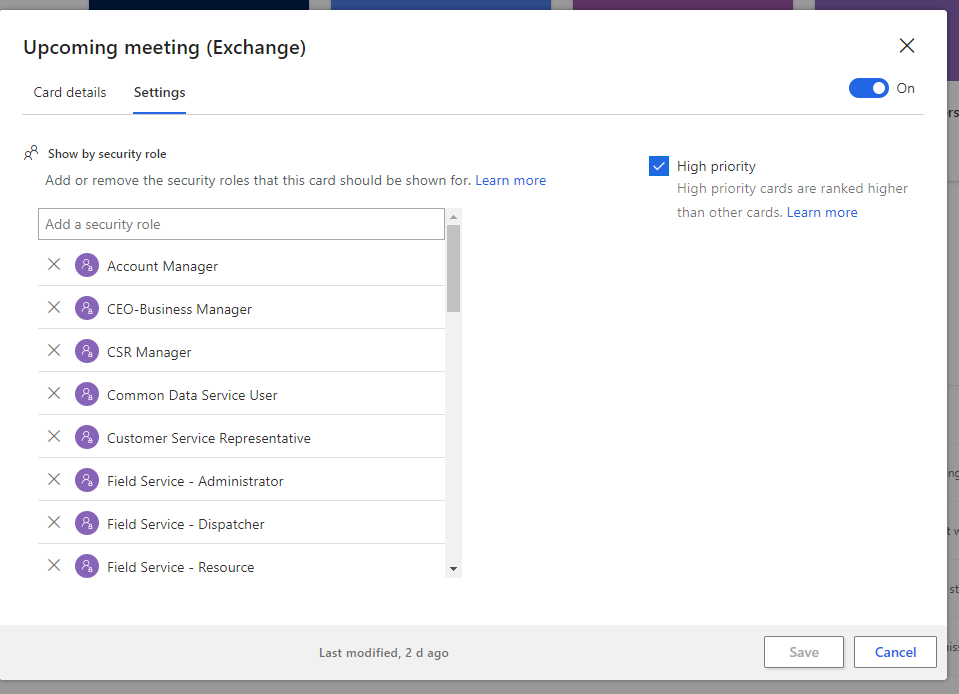
Also, on the left is an ability to tweak the ranking of the cards, which ones appear higher in the view. This is tweaking the inbuilt sorting in addition to being able to make the card a priority. It is pretty limited, only 4 ranks available, but I would think that this is more than enough for most scenarios.

Creating a Custom Insight Card
Though the most common scenario would be using Power Automate to create a custom Insight, it is possible to go further by using cards created as XML and import them into your environment as a solution. The card is triggered by using the Web API. This will require a blog post on its own to get to the details, but for now, here is the link the Microsoft tutorial on the subject. As you are calling the Web API, when and if these cards get created is open to a whole manner of scenarios - alerting from a finance system or bespoke service offering, or even telemetry from your own app or licensing solution is possible.
Thankfully, creating cards via Power Automate is a lot simpler. I will walk through a scenario that is applicable to a Sales team. Everyone has competitors. Competitors all have blog rolls where they publish information on their products and views. It would be good to highlight these new posts to your Sales team, so they are aware of the latest developments prior to discussions with their customers. You can have a trigger for when an RSS feed changes, but this would mean you would have a flow for each blog. Adding a competitor blog would be time-consuming and in-effective.
My design would be to on a daily schedule, loop through each of the competitors stored in the D365 environment with a blog, read any articles that have been posted since the day before and create an Insight card for each.
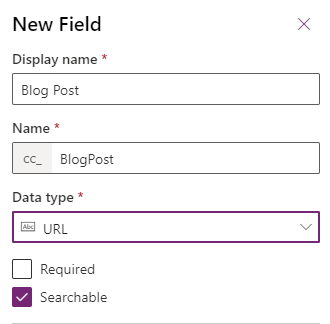
I created a new field on the Competitor entity to enter the blog address.
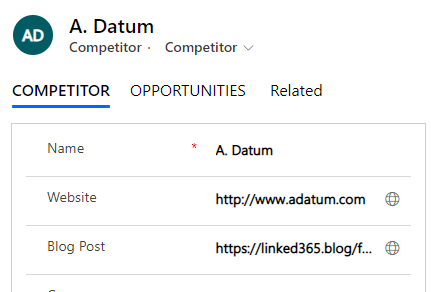
I have put it on the Competitor form and filled it with my blog for testing.
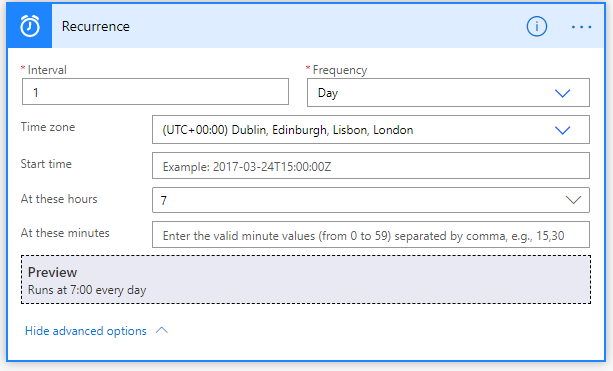
My trigger is a schedule, defined to run every day at 7am.
Then, get all the competitors that have a blog listed.

Each Insight Card that you create needs to have a user that you will show the insight for - something that flummoxed me for a long while. I would have thought that some cards would be applicable to the whole organisation, or a group of users. You can assign a security group for a card, which I will show later, so would assume it would create an active card for each member of the security group at the least. (I created an idea here).
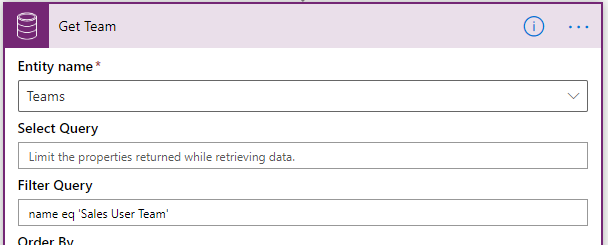
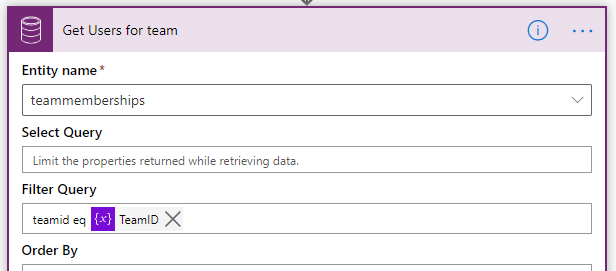
To combat this, retrieve the Team based on a name (to allow for moving between environments)
Put this into a variable for use in the next query without a loop action.

Then, query the team memberships table. The user id is the field needed so this is easier than drilling down to the user table.
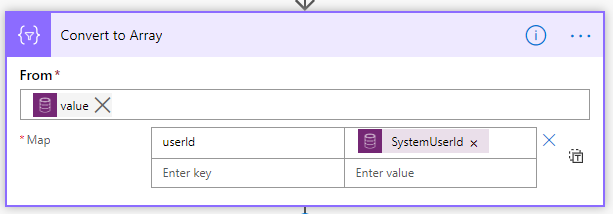
Convert this to an array so the flow can quickly use the values when creating the Insight card.
For each of the blogs, get the posts that have been created since yesterday. If there is any, loop through the articles then for each user create an Insight card.

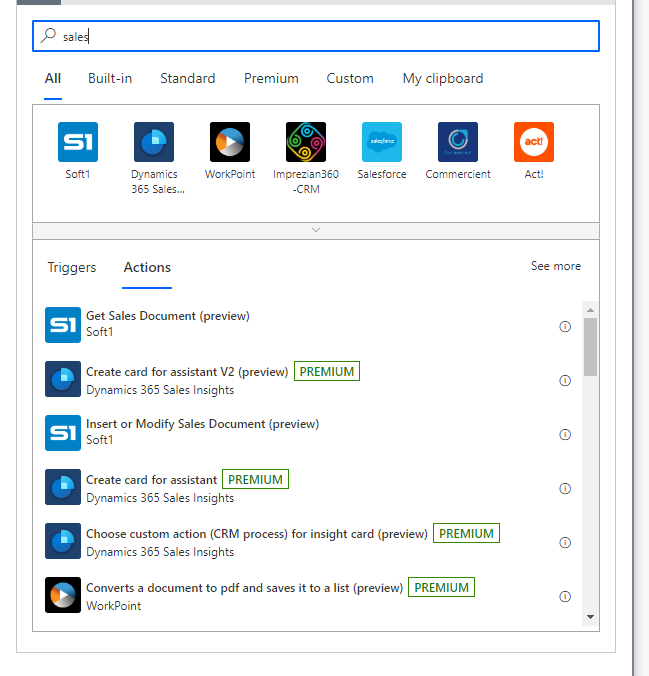
With this information, we can post our card, firstly find the Sales Insights connector, and choose Create card for assistant V2 (preview)
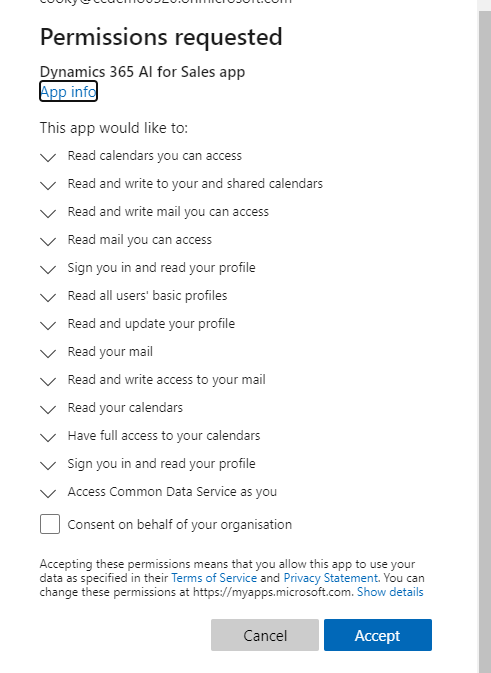
When you add this for the first time, you are prompted to log in and consent for the connector. Lots of permissions needed.
Finally, ready for creating the card. Here, properties from the blog roll and the Competitor are used.
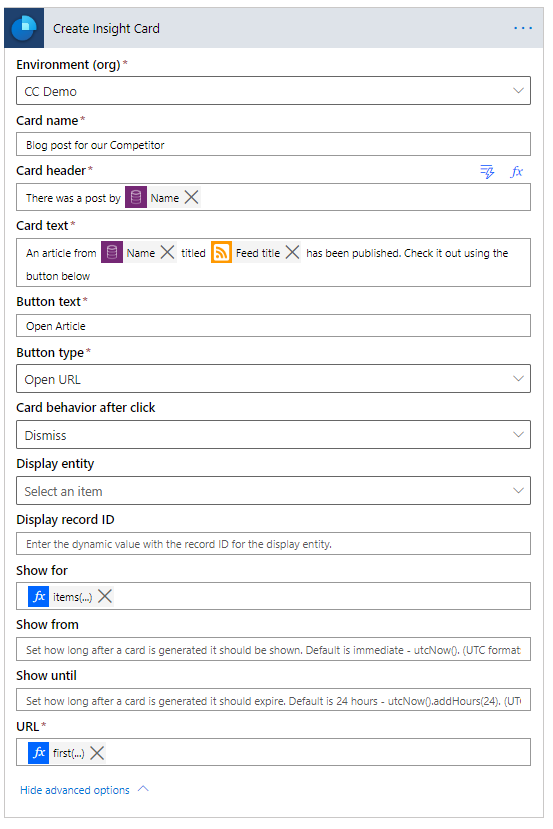
There are other properties that could be applicable to your Sales Insight, such as Card behaviour after click (whether to dismiss\snooze\do nothing to the card when the action is clicked), which entity and record to display the card on (remember this is only for core sales entities so far, namely Account, Contact, Lead and Opportunity) and display dates for the Insight.
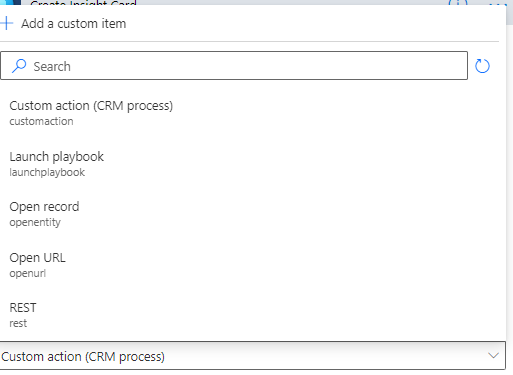
The Button type is an interesting selection. I have chosen open URL, but there is also Custom Action (CRM Process), Launch playbook, Open Record and Open URL. I used Open URL for my demo, will describe the others later in the post.
The Show for is populated with the following. This gets the current user Id from the teams membership array.
|
|
The URL is populated with a link to the article, but as this is an array in itself, take the first one using the code below
|
|
Once this code is run, you should create your first custom insight card, which appears on the dashboard like below
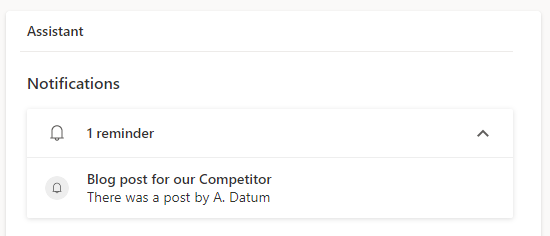
Drilling down into the note gives you more detail and allows the action to be taken.

Button Types
As described earlier, there are 5 actions available in the button types.
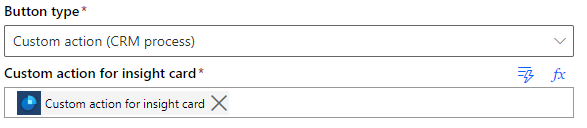
Custom Action (CRM Process)
Custom Action is a relatively new one. It relies on a pre-created action in the Flow that defines the action. This functionality allows the administrator to configure triggering of a workflow or plugin, as long as it is against an entity.
For example, here the action is defined to use the Opportunity custom action CloseAllOpportunityQuotes, define which record it needs to run against and also the quote Status.
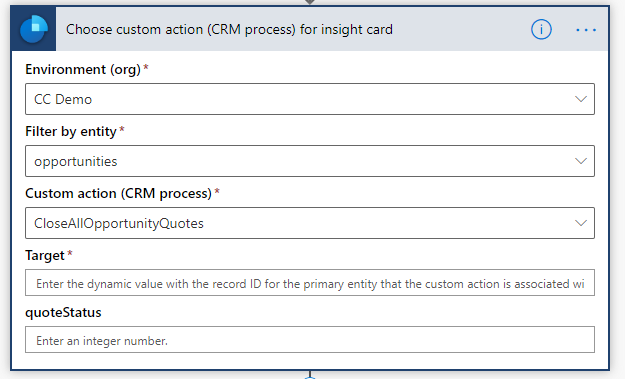
The parameters are defined by the action within the D365 customisation.
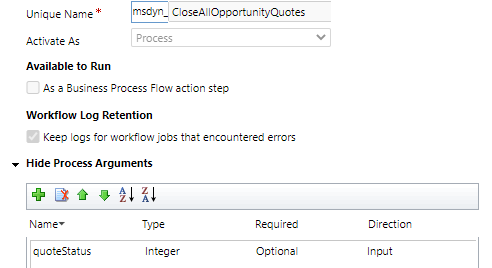
This new action is configured in the Sales Insight card creation step.
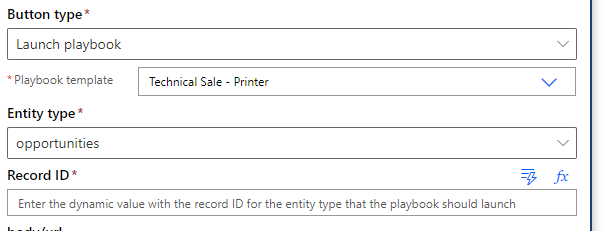
Launch Playbook
Playbooks are a relatively new feature within the Sales app, which allows a sales manager or administrator to configure a pre-defined set of activities, or a play, to define the perfect way an interaction with a customer should work. You can define them on one or more of the core sales entities.

On a Sales Insight card, establish which Playbook template you want to use, define which entity to apply it to and which record.
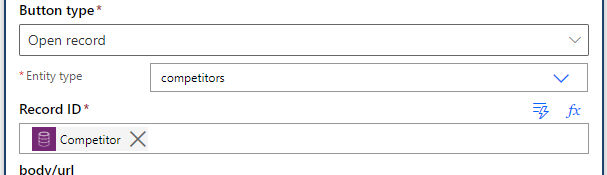
Open Record
This is a simple one, launch a record when the user hits the button. Define the entity and the record Id.
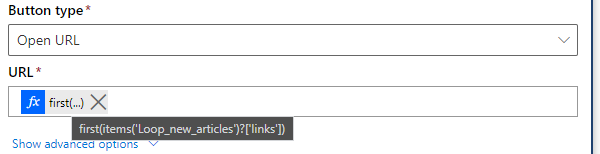
Open URL
Another simple one, I used it in the walkthrough above. You need to define the URL to open, here I link back to the first article link in the RSS feed.
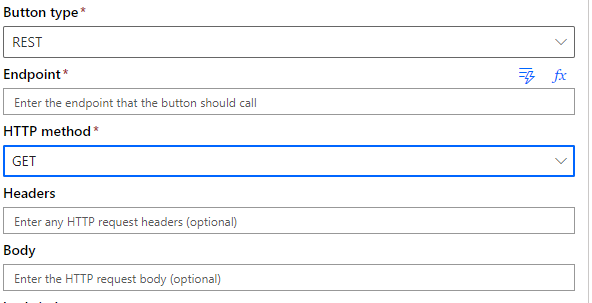
REST
This button type allows interaction with an API endpoint. Define the endpoint, which method, though I am not sure what use a GET would be. Also, define the Headers and body. This allows the user to push content or start activity in external systems, logging a case with ServiceNow or creating an activity in your own bespoke system for example. You could also use this to trigger a Flow and create an interaction via that route.