
I was lucky enough to be given a speaking slot at Summit Europe in Barcelona on this Alex subject. Unfortunately this event is now postponed until June, but I set myself the challenge to replace the Flow in this solution with a more capable (quicker) response time.
Power Automate is great, don’t get me wrong. I love that a low code alternative to connecting applications is available. I love that you can automate anything in your business with a point and click interface. But, there are times when the (ex) prodev in me thinks that this approach could lead to applications that don’t respond to you as quickly as they should.
In my Alexa solution (here) I use a Alexa to trigger a Flow that checks the user’s email, responds to the user then calls a second flow to create a Work Order in Field Service. This response takes roughly 3 seconds, which is on the edge of acceptable. My goal would be to bring this down to at most a second, using a Function.
Functions
Azure Functions are event driver serverless bits of code that can complete complex actions or orchestrations. They are built on Azure, using a consumption operation normally (you pay for the compute resources when they are triggered) so sit around costing you nothing until called. Bit like Flow in this regard.
They can be written in .NET, Java, JavaScript or Python and can scale with your usage. I have experience in a previous live in .NET, so plumped for this.
Please be warned that I am not a prodev anymore. It took me a while to get a Function connected to D365. My days of coding everyday & really understanding the intricacies here are long gone (sadly). If I have done something wrong, then I am sorry. It was just my way of proofing a point. I am sure that the performance can be improved further quite easily.
Create a Function
First you need an Azure subscription. You can get a trial with credit to complete a PoC for free. I am not going through those steps.
Secondly, choose your code environment. I have used Visual Studio 2019, as I struggled with configuring on my PC with Visual Studio Code(It was me) and when I moved to Visual Studio 2019, everything worked. I would recommend starting with Visual Studio Code, as it is free and it is definitely the way forward.
So in visual Studio, we create an Azure Function. Here I start a new project, select the Azure Function template, give the project a name, accept the standard options and I get my code snippet for a function ready to run
Just to check everything is working, lets publish to Azure & try it out!
Here, I select Publish on the project and create all new versions (the original bits are for my complete one) for Resource Group, Hosting plan & Azure storage.
It takes a while the first time as it is provisioning bits in Azure as well as compiling code, but when it is done, you can try it out in Postman.
To get the URL, hope over to portal.azure.com and search for your function. I use the top bar & search for Alexa.
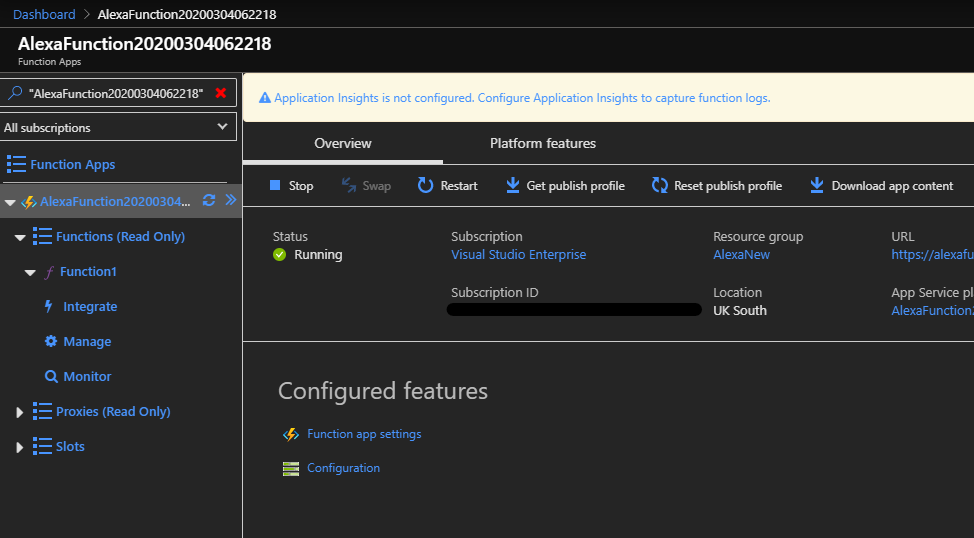
On the left hand side menu, drop down the Functions Menu to show the function we created.
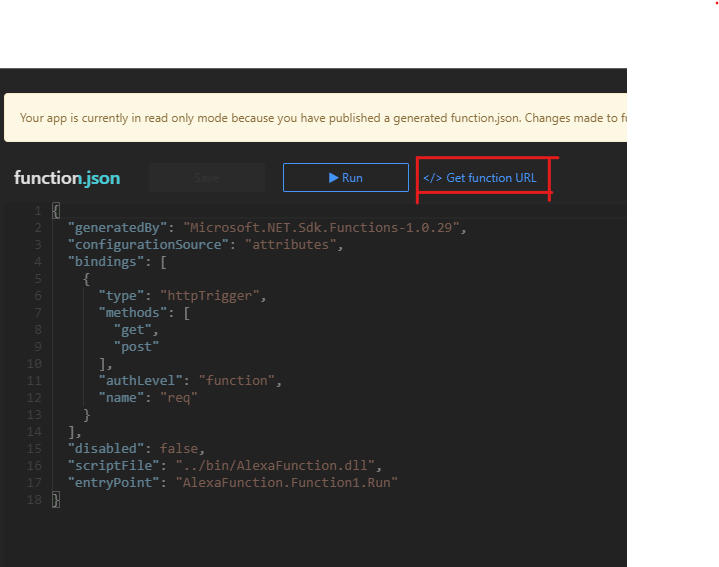
Top right is a link to the URL that we need to post to. This includes the website address plus a function key. This secures the API a little. This is a PoC, so this is enough for me, but in production, be wary about opening functions to the public
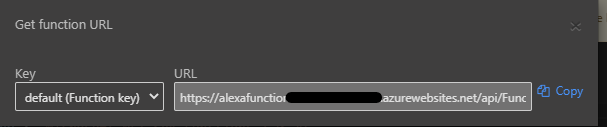
If you hit copy & paste this into a Postman session, or just a webpage, you will get the default response back.
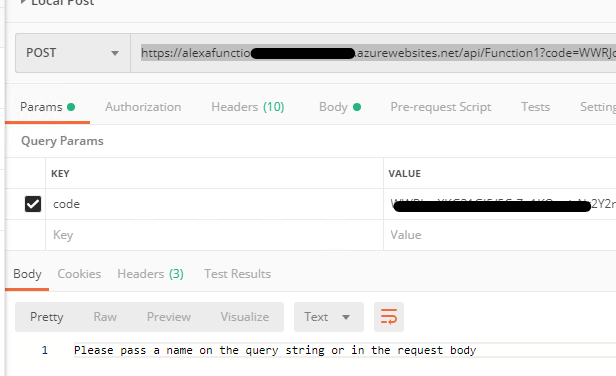
If you add a query parameter like it is expecting, namely name, you will get a different response
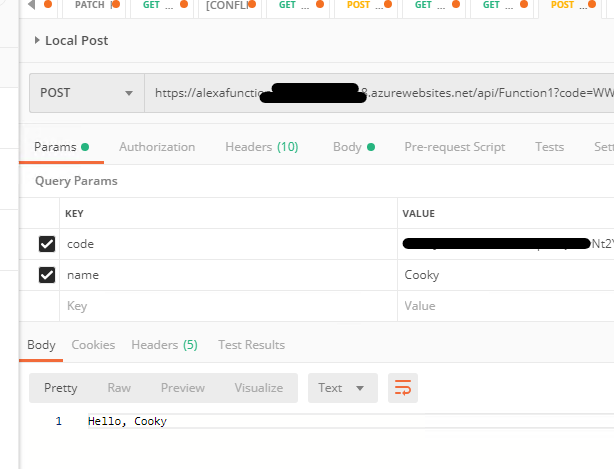
So, this is a simple function, deployed to Azure, with a post & return. That easy!
Alexa Function - Getting the current user
As I said in the outset, my code is not perfect by any means. I expect (encourage) criticism, to expand my understanding of the subject. I don’t intend to go through my code line by line, just the key aspects.
The code is available here
The function call has an attribute which is used to define the call to the function. This tickles to your Azure Function.
[FunctionName(“Alexa”)]
public static async Task
The next part retrieve the JSON body of the trigger from Alexa and converts the body into an object from which we can ascertain parts of the request body.
string content = new StreamReader(req.Body).ReadToEnd(); dynamic alexaContent = JsonConvert.DeserializeObject(content);
The main part we want is to get the Alex access token. This allows, as I described in the second part of the Alexa blog, the retrieval of information about the user that is interacting with Alexa.
    if (alexaContent.context.System.apiAccessToken == null)
    {
        log.LogError("No Access Token sent");
        return null;
    }
This section calls Alexa api, using the apiToken that was sent and asks for the email of the user. If we get an error, as in we have not got approval, respond straight way, the same as we did for Alexa in Flow.
using (HttpClient client = new HttpClient()) { client.BaseAddress = new Uri(“https://api.eu.amazonalexa.com/v2/accounts/~current/settings/Profile.email"); client.DefaultRequestHeaders.Authorization = new AuthenticationHeaderValue(“Bearer”, apiAccessToken); try { emailAddress = await client.GetStringAsync(”"); log.LogInformation(emailAddress); } catch (Exception ex) { log.LogInformation(ex.ToString()); var errorObject = new { version = “1.0”, response = new { card = new { type = “AskForPermissionsConsent”, permissions = new string[1] { “alexa::profile:email:read” } } } }; return new JsonResult(errorObject); } }
Alexa Function - Authorisation against D365
The next section retrieves a list of variables stored in a local settings file, local.settings.json or in the application settings when this becomes a proper function. This allows you not to store client secrets etc within the code and also allows you to alter where the function is pointed to for dev \ test environments.
string baseUrl = Environment.GetEnvironmentVariable(“baseUrl”); string clientId = Environment.GetEnvironmentVariable(“clientId”); string secret = Environment.GetEnvironmentVariable(“secret”); string authority = Environment.GetEnvironmentVariable(“Authority”);
string getToken = await GetToken(baseUrl, clientId, secret, authority, log);
The GetToken function is below. I used the code from docs.microsoft.com here. This code steps you through creating an application user and giving it the appropriate rights, as well as how to configure the clientId & secret.
private static async Task
Next is to check the email is in D365. Firstly, I configure the httpClient object, then call the api to retreive all the contacts that have a emailaddress1 equal to the email sent by the user. I only care about the first name & last name, so using the select will return only those fields.
If there is a response, I carry on, if not, I need to respond to the user again.
using (HttpClient d365Connect = new HttpClient()) { d365Connect.BaseAddress = new Uri(baseUrl); d365Connect.DefaultRequestHeaders.Add(“OData-MaxVersion”, “4.0”); d365Connect.DefaultRequestHeaders.Add(“OData-Version”, “4.0”); d365Connect.DefaultRequestHeaders.Accept.Add(new MediaTypeWithQualityHeaderValue(“application/json”)); d365Connect.DefaultRequestHeaders.Authorization = new AuthenticationHeaderValue(“Bearer”, getToken); HttpResponseMessage contactResponse = await d365Connect.GetAsync(“api/data/v9.1//contacts()?$select=firstname, lastname&$filter=emailaddress1 eq ‘” + emailAddress + “’”); if (!contactResponse.IsSuccessStatusCode) return null; log.LogInformation(“Read Contact”); JObject jContactResponse = JObject.Parse(contactResponse.Content.ReadAsStringAsync().Result); if (!jContactResponse[“value”].HasValues) { log.LogInformation(“Cant find contact”); var errorObject = new { version = “1.0”, response = new { outputSpeech = new { text = “Hi, Big Energy Co here. Unfortunately,” + emailAddress + “is not registered with us for the Alexa App. Please contact 01234 567890 during office hours to configure your account”, type = “PlainText” }, card = new { type = “Standard”, title = “Big Energy Co”, text = “Unfortunately, " + emailAddress + “is not registered with us for the Alexa App. Please contact 01234 567890 during office hours to configure your account” } } }; return new JsonResult(errorObject); }
In the flow, it is at this point, when I have enough information, I send over to a child flow. In this scenario I am sending over to a service bus. I will detail how that works in the next post, as configuring the bus etc will take time. You can always get ahead of the action by taking a look at the code.
Alexa Function - Respond to the user
Finally, we need a proper response to the user. Similar to the flow, we have a switch on the intent. I use a string that I append to and build up. The Azure parts are only for me to check that the response is from Azure version rather than Power Automate.
switch (intent) { case “service”: returnBody = “Hi, we have recieved your request for an Azure Service “; returnBody += device == "” ? "” : " for your " + device; returnBody += date == string.Empty ? "” : “. We will endeavour to book a service on " + date; break; case “repair”: returnBody = “Sorry to hear you have a Azure broken “; returnBody += device == string.Empty ? “device” : device; returnBody += date == string.Empty ? "” : “. We will endeavor to send an engineer on " + date; break; case “emergency”: returnBody = “Oh No! An Azure Emergency!”; break; default: returnBody = “OK, Big Energy Azure Function has got your request”; break; }
By creating an object then converting to JSON, this can be used as the response.
returnBody += “. One of our support specialist will contact you within the hour to confirm the scheduled time for our engineer”; var returnObject = new { version = “1.0”, response = new { outputSpeech = new { text = returnBody, type = “PlainText” }, card = new { type = “Standard”, title = “Big Energy Co”, text = returnBody } } }; log.LogInformation(“Responding”); return new JsonResult(returnObject);