In my previous post I walked through swapping out Power Automate with Azure Functions for responding to Alexa in our Field Service scenario.
This post is about finalising the code by using Service Bus function to create the Work Order.
In the Power Automate version I used a child flow call to allow the response to happen quickly, without waiting for the numerous calls to establish data then creating the record. This is standard, good practice to improve the response time.
Create the Queue
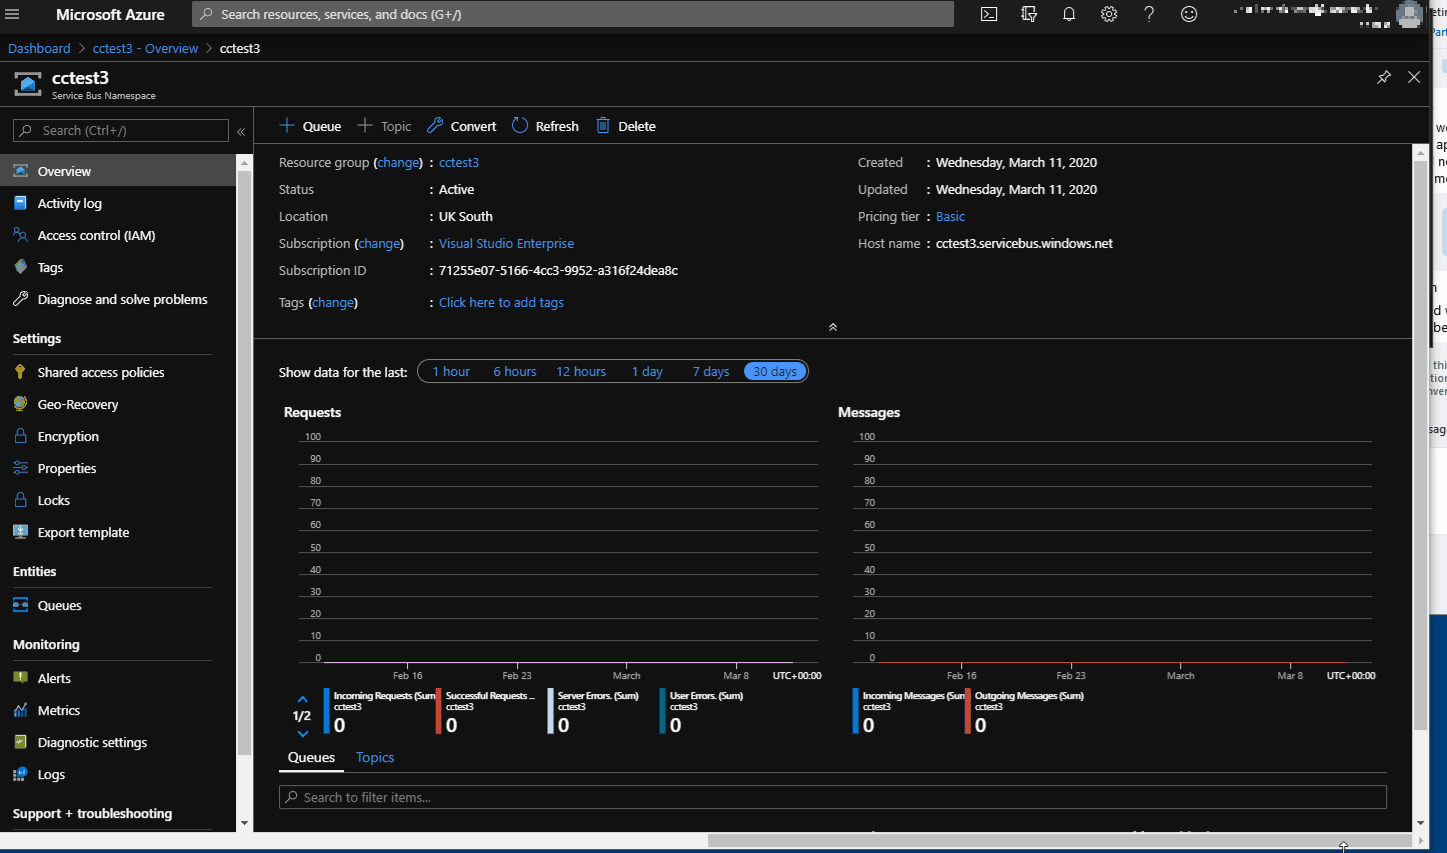
Firstly, over to portal.azure.com & create a service bus. The service bus is the messaging underpinning for our queue.
Next create a queue within the service bus. Queues are a list of things that your code needs to process. Functions can then be subscribed to the queue to be triggered when something enters the queue
Adding to the Queue
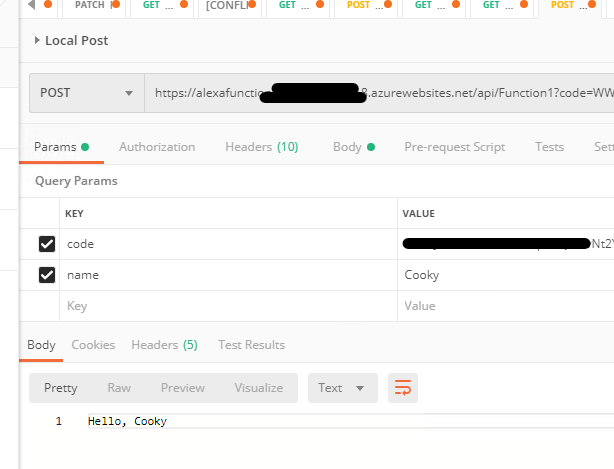
Back in our first function, you only require a few lines to add an item to the queue. The first line gets an environment variable like previously, from the local json file or the application settings within the Azure function.
The object I create here is to simply pass all the details I need to the queue.
var queueClient = (IQueueClient)new QueueClient(Environment.GetEnvironmentVariable(“ServiceBusConString”), Environment.GetEnvironmentVariable(“queueName”), ReceiveMode.PeekLock, null); var fsObject = new { email = emailAddress, contactId = (Guid)jContactResponse[“value”][0][“contactid”], intent, date, device }; Task messageReturn = SendMessagesAsync(JsonConvert.SerializeObject(fsObject).ToString());
I then call the function SendMessagesAsync, converting the object to a string as I do it. The SendMessageASync is below
private static async Task SendMessagesAsync(string messageToSend) { try { Message message = new Message(Encoding.UTF8.GetBytes(messageToSend)); Console.WriteLine(“Sending message: " + messageToSend); await queueClient.SendAsync(message); message = null; } catch (Exception ex) { Console.WriteLine(string.Format("{0} :: Exception: {1}”, DateTime.Now, ex.Message)); } }
Call the method uses an Asynchronous call which I don’t wait for the return. I just assume it works and get on with responding to the user.
Reading the Queue
To read the object from the queue, you need to register the function as a subscriber to the queue.
To do this, the function trigger needs to have a certain format
[FunctionName(“AddToFS”)] public static async void AddToFS([ServiceBusTrigger(“ccalexa”, Connection = “ServiceBusConString”)] string myQueueItem, ILogger log, ExecutionContext context) {
The parameters to the function connect to a queue called ccalexa & a service bus indicated in the application variable “ServiceBusConString”. This signature shows that Microsoft is thinking about moving between environments from the start.
The next part of the function defines the parameters for the call to D365. This leads to parsing the object that is being found on the queue.
JObject woObject = JObject.Parse(myQueueItem);
Guid contactId = (Guid)woObject[“contactId”]; var email = woObject[“email”]; var intent = woObject[“intent”]; string date = (string)woObject[“date”]; string device = woObject[“device”].ToString();
Once we have the detail of the item sent in, we can go to D365 and retrieve some records we need to create the Work Order, firstly to the Contact, to retrieve the account associated with it.
var contactResult = await d365Connect.GetAsync(“api/data/v9.1/contacts(” + contactId + “)?$select=_parentcustomerid_value”); if (!contactResult.IsSuccessStatusCode) { return; }
If the return is not success, something went wrong. Forgive me for not doing some proper error trapping here. Next, we work to get the Default Pricelist, from the account & work order type from the intent passed in
JObject contactObject = JObject.Parse(contactResult.Content.ReadAsStringAsync().Result); var accountId = contactObject["_parentcustomerid_value"]; HttpResponseMessage accountResponse = await d365Connect.GetAsync(“api/data/v9.1/accounts(” + accountId.ToString() + “)?$select=_defaultpricelevelid_value”);
JObject jaccountResponse = JObject.Parse(accountResponse.Content.ReadAsStringAsync().Result);
Guid priceListId = (Guid)jaccountResponse["_defaultpricelevelid_value"];
HttpResponseMessage woTypeResponse = await d365Connect.GetAsync(“api/data/v9.1/msdyn_workordertypes()?$select=msdyn_workordertypeid&$filter=cc_alexaintent eq ‘” + intent + “’”);
JObject jwotResponse = JObject.Parse(woTypeResponse.Content.ReadAsStringAsync().Result); Guid woTypeId = (Guid)jwotResponse[“value”][0][“msdyn_workordertypeid”];
Next, we build up the object to add as a new work order. Line 2 shows binding to a pricelist record. This method is used for type & account too. I also generate a random number for the name to keep consistent with the Flow version.
JObject workOrder = new JObject(); workOrder.Add(“msdyn_pricelist@odata.bind”, ("/pricelevels(" + priceListId + “)”));
workOrder.Add(“msdyn_name”, (“AZ” + new Random().Next(4000, 500000))); workOrder.Add(“msdyn_serviceaccount@odata.bind”, ("/accounts(" + accountId + “)”)); workOrder.Add(“msdyn_systemstatus”, 690970000);
workOrder.Add(“msdyn_workordertype@odata.bind”, ("/msdyn_workordertypes(" + woTypeId + “)”)); workOrder.Add(“msdyn_taxable”, false);
if (date != string.Empty) workOrder.Add(“msdyn_timefrompromised”, date); if (device != string.Empty) workOrder.Add(“msdyn_instructions”, device);
log.LogInformation(workOrder.ToString());
HttpRequestMessage createWO = new HttpRequestMessage(HttpMethod.Post, d365Connect.BaseAddress.ToString() + “api/data/v9.1/msdyn_workorders”);
createWO.Content = new StringContent(workOrder.ToString(), Encoding.UTF8, “application/json”);
HttpResponseMessage createWOResp = d365Connect.SendAsync(createWO, HttpCompletionOption.ResponseContentRead).Result;
Finally a post method to the msdyn_workorders entity pushes this as a new work order into the system.
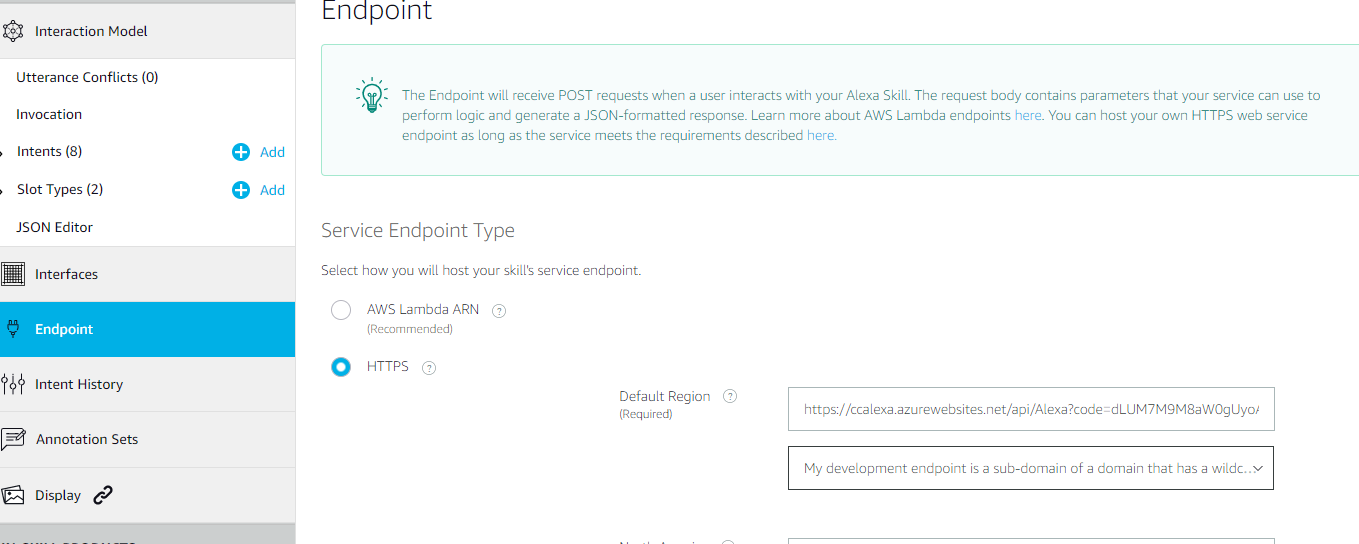
Connecting Alexa to our Function
This is the simplest bit. In the original set of posts, I talked about endpoints. The endpoint needs swapping to the function call.
The URL is retrieved the same way as I did in my demo, from the Azure Function properties in the Azure portal.
Update the Service Endpoint & you are good to go.
The results
When I started this challenge, I wanted to compare and contrast the response time between Flow and Functions. I would assume Functions would be quicker, but what would the difference be?
Caveats here - Both the flow and the function are my code. I am sure that there are better ways of doing both. Both follow each other functionally so it is a fair comparison.
To test, I swapped the end point and then did 5 runs to “warm up the code”. I found , particularly Azure function, took a while to come up to speed. This can be explained by cold starting of functions which will be the case in our scenario. Even flows run faster the second time through.
I then ran the test cycle 10 times then used the monitoring within Alexa to monitor response time. Both sections I checked I was getting work orders being created correctly.
The first blip in the chart is the Flow configuration. This has a P90 (90 percent of the requests where responded within this time) of over 4 seconds. It drops to a more respectable 1 second as the Flow is warmed up.
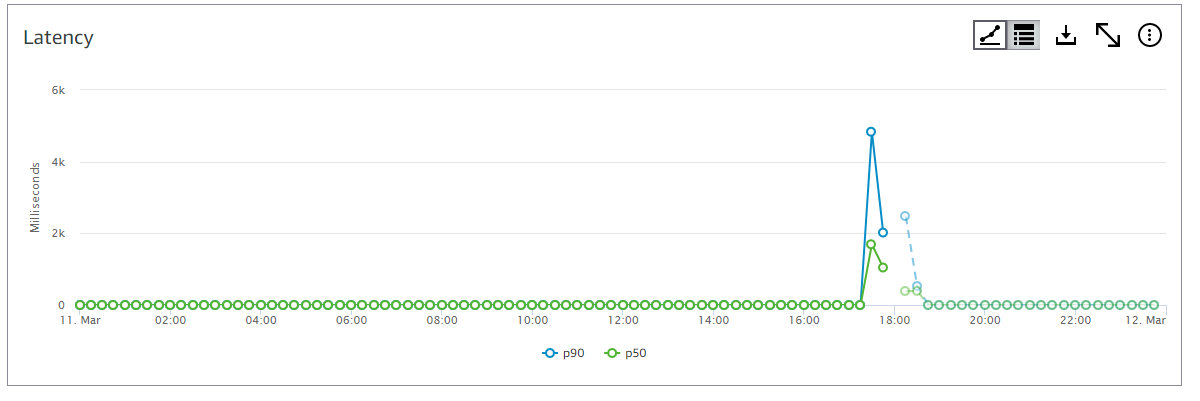
The second blip is when the configuration swaps to Azure Function. You can see this has a peek around 2 seconds for the first call. then dropping to 300ms for each subsequent call. This is a vast improvement for the responsiveness of your app.
Don’t get me wrong, I am not telling you to revert everything to a Function, it is using the right tool for the job.
Power Automate got me this far, it is great for scenarios where you don’t need an immediate response, it is great to prove that developing Alexa into your toolset is beneficial, but if you want to get serious about the user experience, in this instance, a Function serves you better.