Working with demo or test data, you normally need a set of data rather than one table. For instance, for a Customer Insights demo, I would want hundreds of accounts, thousands of contacts associated with those accounts and tens of thousands of cases associated with the contacts. This will have to be realistic, randomised data that shows the last 3-6 months rather than a stale set of data. The same with Opportunities - create a realistic data set of accounts, contacts, opportunities, orders and the associated product lines. Rinse and repeat next time you need a new demo as your trial has expired.
With this in mind, I created Data Sets for the Mockaroo Data Munger tool for the XrmToolBox. It is available with the rest of the great tools here.
TL;DR
I have updated the Mockaroo Data Munger with Data Sets. This article walks through how to use this new bit of functionality.
Walkthrough
Firstly, you need to create and save your data inserts. Let us assume that we want the scenario above, Accounts, Contacts and Cases. Creating the Account is straight forward, with standard options.
Contacts are where it becomes tricky, as you want to create contacts associated with the newly created Accounts. For this, I have created From Set option. This will populate the field with the GUID of the primary key of any record created previously in the set. So the contacts will be associated with one of the accounts we created in the set. This will use the whole of the selected table if you don’t use it as part of a set.
For Contact, there is a Customer Type field, which allows you to associate with a Contact or Account, so I give you both options here.
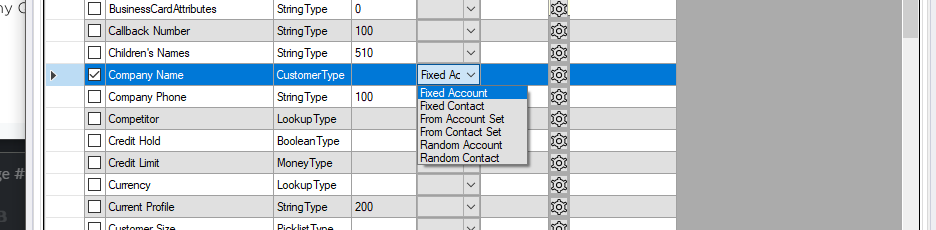
The same applies with Case, it too has a Customer field, which can be both Account or Contact.

Create your Set
Once I have created my maps, with all the relevant options, I need to create the Set. This is available via the Create Data Set button in the tool bar

Up pops the data set creation tool.
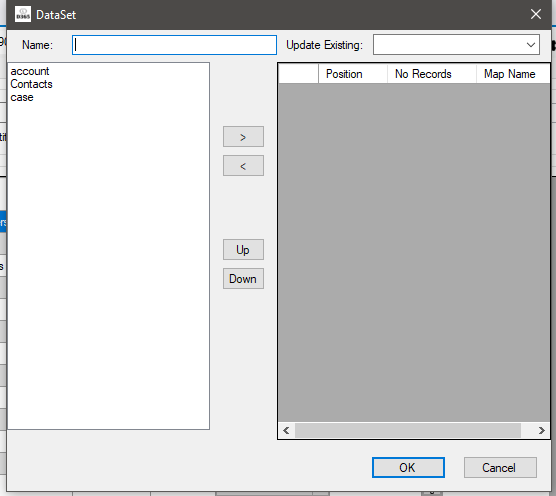
On the left are all your saved maps. Bring them into your set by selecting one and choosing the Right arrow, remove it from the set by choosing the left arrow. Re-arrange the maps in the set by using the up/down buttons.

Once you are happy with the configuration, hit OK and you are ready to run. This screen also allows you to update an existing set as well.
Creating the Data
Now you are ready, hit the Play Set button.

This can take a while, depending on the amount of data you are creating, but you should get a success message and the data will be created in your environment.
What’s next for the Munger?
Like with the ERD tool, I want to allow export/saving of maps and data sets. Other feature requests are being accepted over at GitHub