
This tool is a long time coming, and hope it helps anyone that is a clicky admin rather than PAC CLI
TL;DR
A new tool to administer your Power Automate flows - change owner, enable/disable etc.
Walkthrough
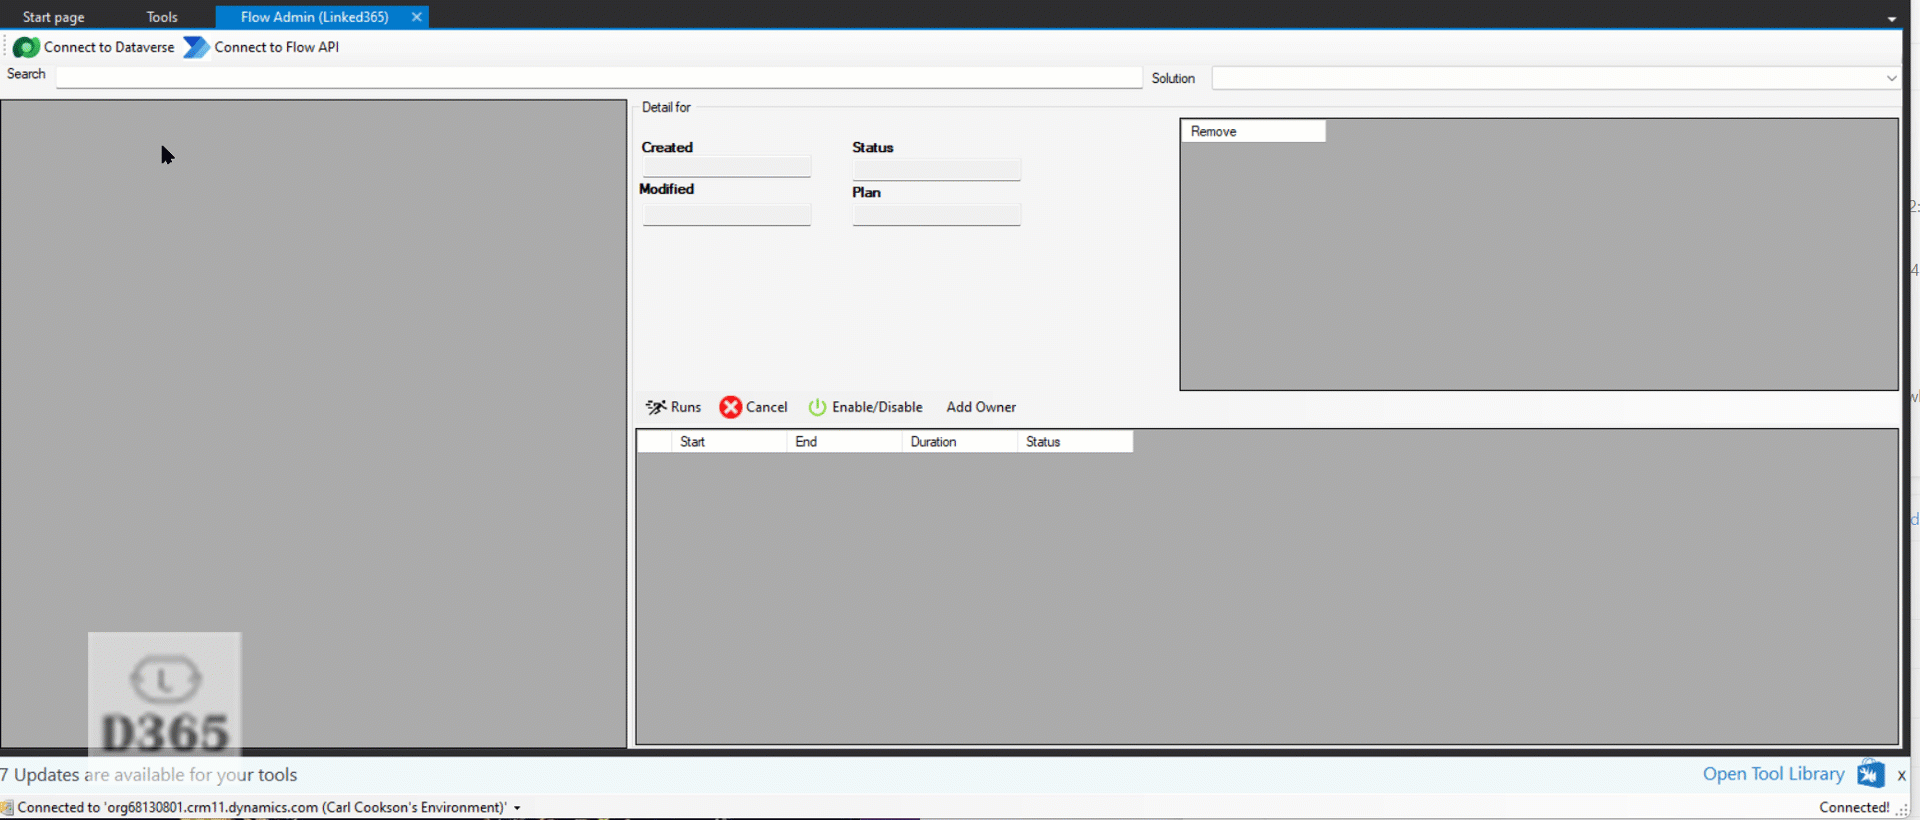
The screen is split into 3 main areas, as highlighted below
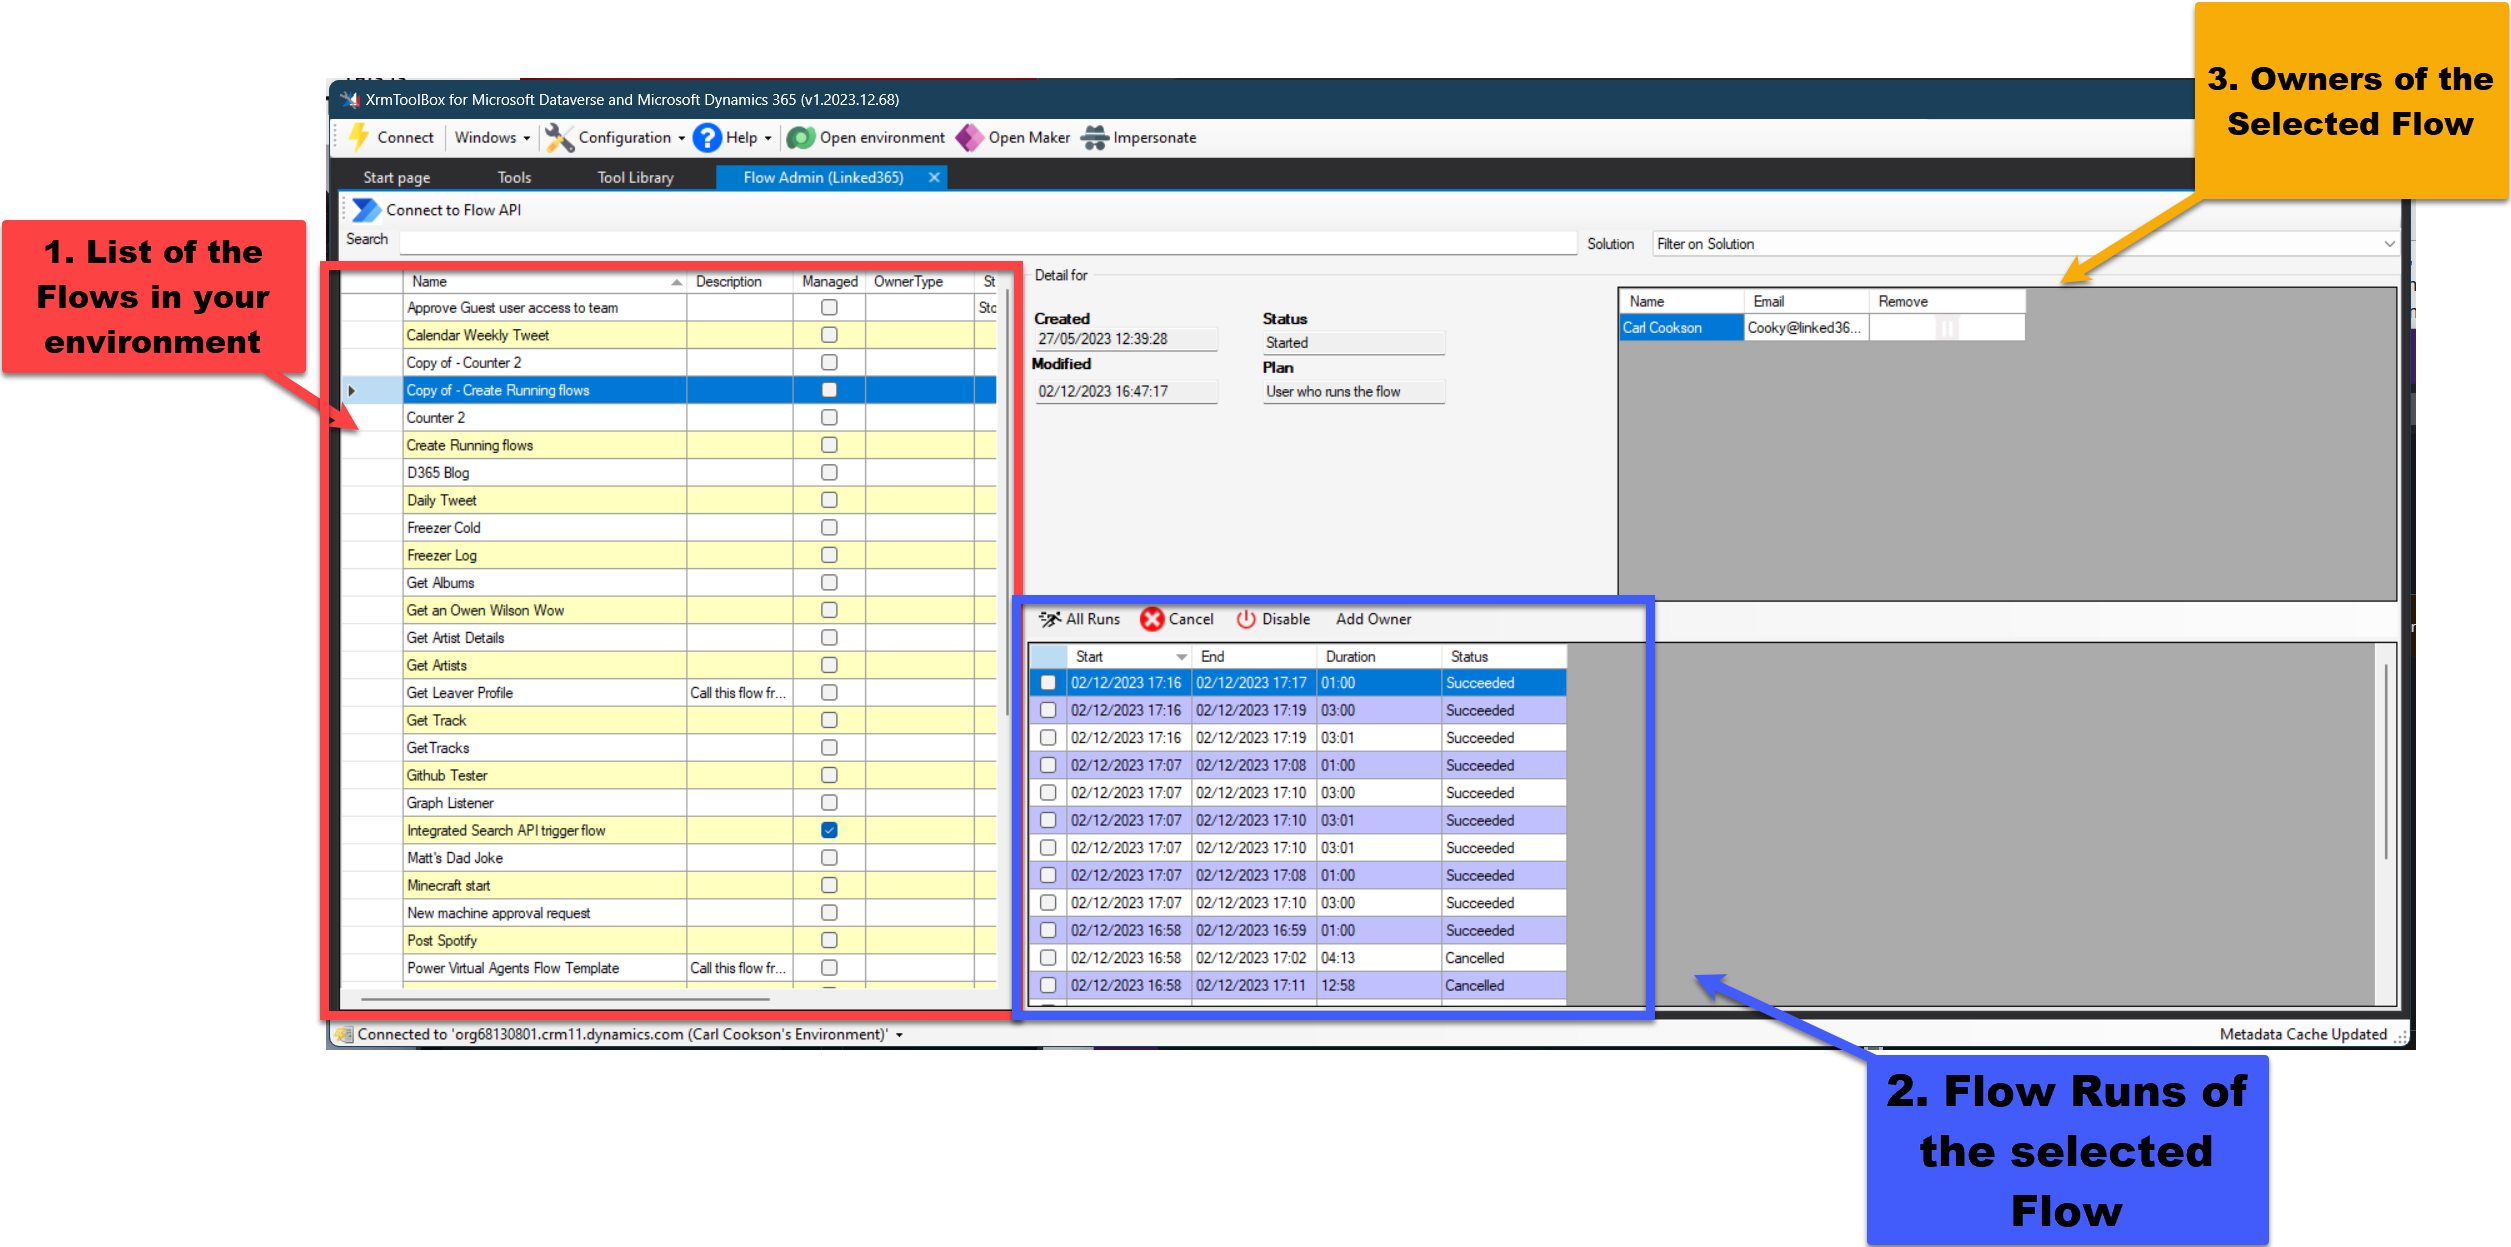
List of all the flows in your environment, either in dataverse or outside via the Power Automate API
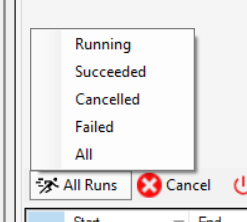
List of the Flow Runs - select Running, Succeeded, Cancelled, Failed or All.
- List of the Flow Owners
To get to this point, you need the app to have access to your Power Platform instance (via Dataverse or Flow API), the Flow API (for owners and updating) and Graph API (to get new owners etc). This is detailed in the Connecting to the APIs section below.
Changing a Flow Owner
Select a flow in the left hand side.
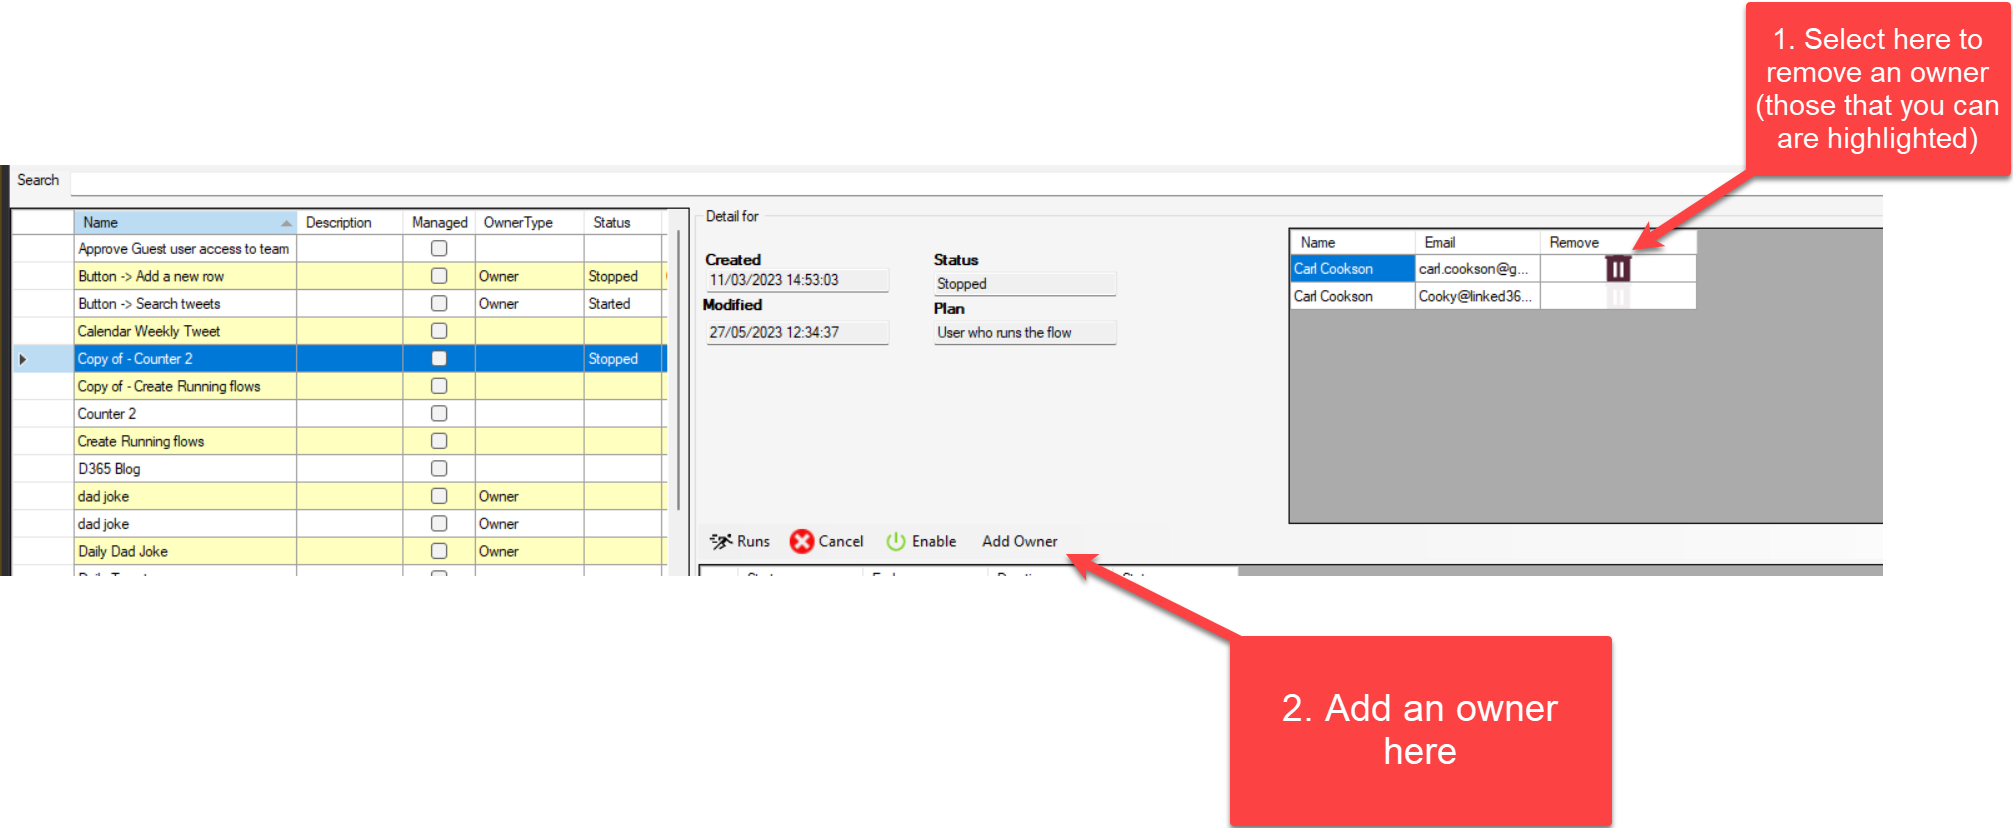
Once connected, in the right hand pane (1) you will see the current owners, you can click on the dustbin to remove the owner. Only owners which you can remove (not the creator of the flow) will be enabled for removal.

If you need to add an owner, click on the Add Owner button
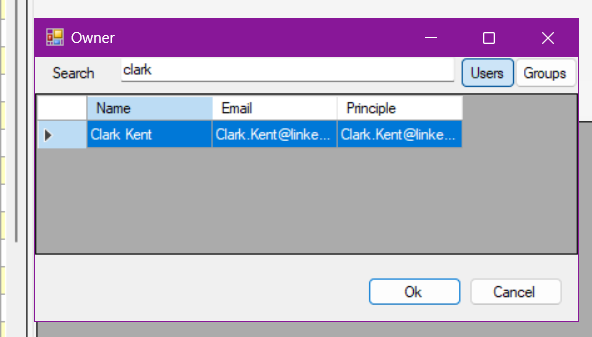
This little dialog allows you to add one or more owners, after you have confirmed you are happy with it.
Enable/Disable a Flow
Frequently, there is a need to disable a flow. Troublesome flows or just those that you no longer need, can be disabled or re-enabled once you are in a position to do so.
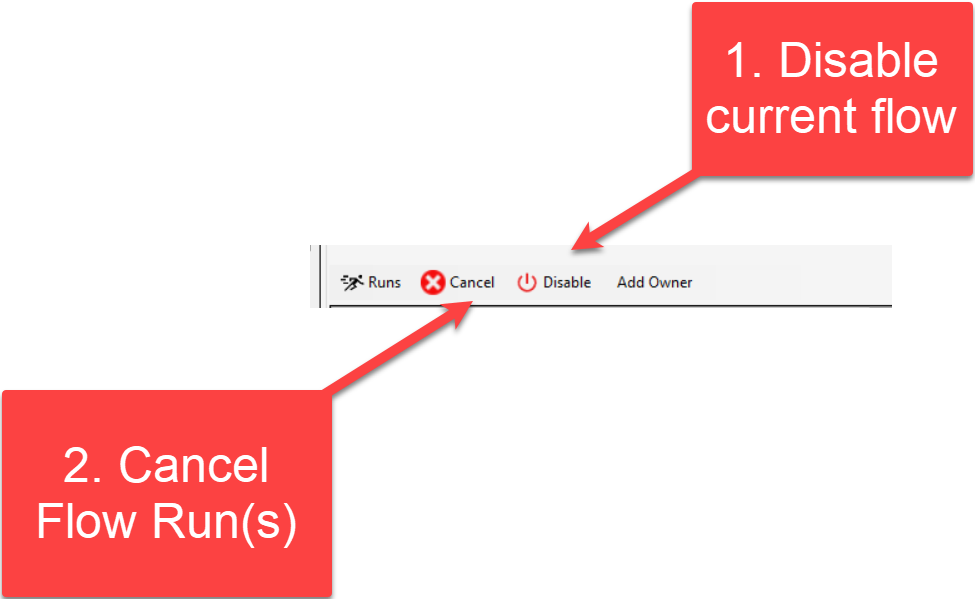
The Enable/Disable button (1) will toggle depending on the current state of the flow selected.
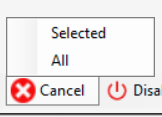
Cancel Flow Runs
Flow runs in them selves can be problematic. Recurring flows that run away from themselves creating thousands of runs. These can then be cancelled in a couple of clicks by pressing the Cancel button and choosing to cancel all “Running” runs or those you have selected in the Runs grid.
Demo
Connecting to the APIs
Most XrmToolBox tools are directly connected to your Dataverse environment, with the Flow Admin, the tool is reliant on the Power Automate API (to enable/disable as well as flow runs) as well as the Graph API to retrieve properties of the new owners.
Utlising these APIs requires a little more work and potentially a friendly Azure Administrator. What ever happens, you are utlising OAuth credentials to connect, so any user will only see and administer the flows they have access to.
Configure access to Flow API
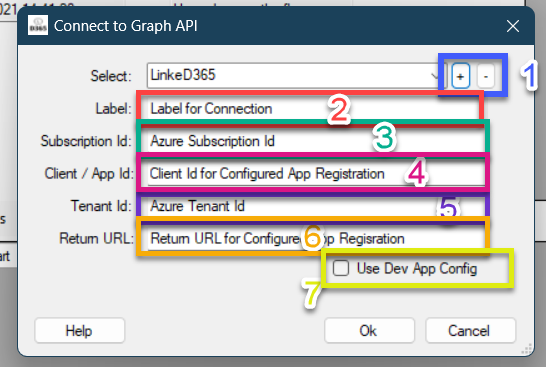
When you click on the Connect to Flow API button or if you select one of the Flows in a list from Dataverse, you are presented with the FLow API connection dialog. Each one of these fields filling to allow you to connect to your environment
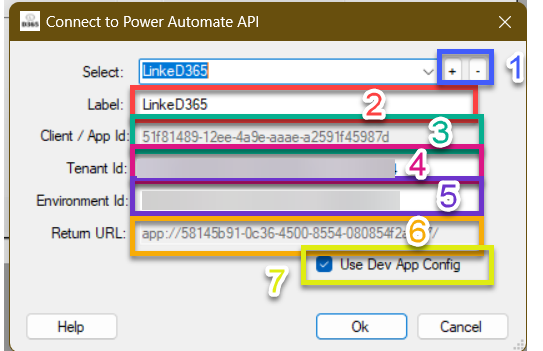
This adds a configuration to the list (or removes the current one). Once saved, these connections are saved in a config file to retrieve next time round.
The next is a label for the connection, as you can have more
The next field is the Client or App Id. These can be configured if you want to non-dev settings by creating an app registration
This is documented Here
You do need Read access to all flows in your configuration (if you want to override th permissions a user has normally)

Once configured, back on the App registration, the image below highlights what needs mapping to the fields above

Tenant ID is in the list above too, if you are on that screen. Otherwise, it is on the main Azure Portal under Tenant Properties.
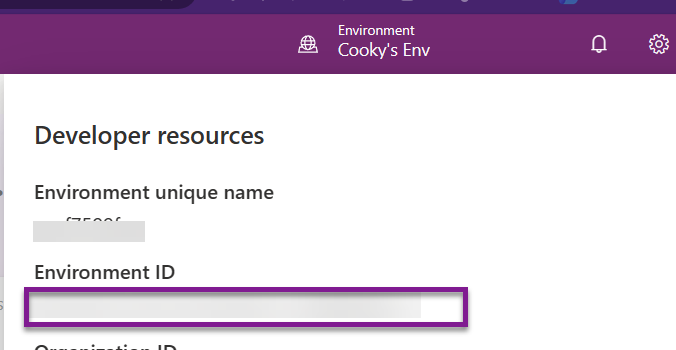
Environment ID is next, which is retrieval by selecting the Developer Resources panel in any environment
Return URL is part of the App Registration, and tends to be localhost
Use Dev settings allows you to ease your pain and shortcut the issues somewhat. Highlighted here, Microsoft allows you to their app registration, but then use OAuth to do the authentication. Makes life simpler and fills out the Return URL & App Id boxes. THis means you don’t need an app registration at all, if you have the appropriate admin rights on your system.
Once you are set, you will be prompted to sign in using OAuth2, with a popup to add your credentials and MFA if enabled. Standard logging in stuff.
Configure Access to Graph API
Graph API is used to get the owner information and look for new owners. In Dataverse, this can be taken from the User table, but outside of Solutioned flows, you have to use Graph. This configuration is very similar to Power Automate API.
- This adds a configuration to the list (or removes the current one). Once saved, these connections are saved in a config file to retrieve next time round.
- The next is a label for the connection, as you can have more
- This is the subsription we are working with. I am not sure this is needed, but need to check.
- This is the Client ID/ App Id, taken from when you register a App, as before.
You do need to ensure the app registration includes User.Read

Info
As with all access and configuration, check with your Entra Administrator first
Return URL is part of the App Registration, and tends to be localhost
Use Dev settings allows you to ease your pain and shortcut the issues somewhat. Highlighted here, Microsoft allows you to their app registration, but then use OAuth to do the authentication. Makes life simpler and fills out the Return URL & App Id boxes. THis means you don’t need an app registration at all, if you have the appropriate admin rights on your system.
Next Steps
So, where does the tool go from here? I have plans to make the add/remove owners and disable multi flows at once. There is also lots of extra bits that you can do via the Power Platform CLI descibed here that I should be able to include. Daniel Laskewitz is doing a great job on guiding the development, but I am more of a clicky person.
Let me know what feature you need as well. Can’t promise to do it, but hey, do it yourself and create a pull request so we can share with the world!