The user has been notified that they have a new report, the manager has updated some fields on their user record, they now want to add some roles and teams to allow them to start work.
Objectives
- The Scenario (Part 1)
- Notifying the manager of a new Employee (Part 1)
- PowerApp to display and update User Data (Part 2)
- Update Roles and Teams (This Part)
Listing Roles that user hasn’t got
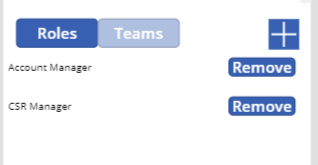
The grid at the bottom of the user screen shows the roles that the user has. If we want to add a role to that list, firstly lets display the roles available to them.
On the form visible event, there is a lot going on. I have already discussed defining the XML to get the list of roles and teams for the user. In this code I also create XML to retrieve the roles the user hasn’t got. Again, FetchXML Builder is your friend.
A looping concatenation isn’t available (well not this week) in PowerApps, so you have to get around this by populating a table with one or more strings then concatenating the output of the table.Using the Set command, create a variable and populate it with a string like below using the ForAll command to repeat the string build for each of the roles the user has got.
| |
This, when you then use the ConCat command creates one string with these as many parts in in as roles the user has.
| |
The final string combines this string with the other bits that I am interested in, selecting the attributes that is required as well as filtering the roles return to only those in the users BU. If this condition is not put in, all the roles that are associated with all the BUs will be returned. In D365, a role is duplicated for each BU you create, and you need to associate the user with the right role for their BU.
| |
This produces an XML that looks like the below.
| |
On selecting the plus button at the top of the grid for Roles, another collection is populated using the custom connector, passing the XML to the Roles definition.
| |
Add Role screen
The final screen is a simple gallery, with the name of the role displayed.
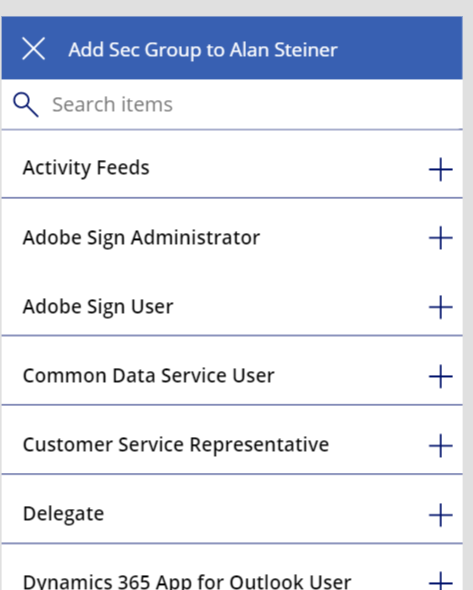
All the work is done on the + icon. This calls another custom connector, adding the role to the user. Postman is your friend here. My Postman to insert a role for a user is shown below
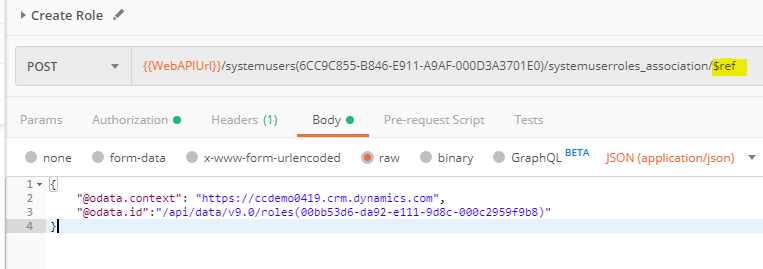
Basically, this is posting a body containing a systemuserroles_asscociation to the the webapi, which creates a new one. The user reference is in the URL and the roleId is in the body.
Now, I confess I am not the most offay on the best way to use the Web API. This is one of the reasons I am writing a blog, learning. See that little highlighted $ref? I spent hours trying to get this working and only found that this is required at the end. If you omit the $ref, it returns a positive result. Same if you try to add a role that belongs to a BU that the user doesn’t. Someone tell me where this is logged so next time I can do some troubleshooting rather than trial & error?
The D365 document does mention it, but it is simply missed and it is part of the OData standard for addressing references between entities. As I say, learn everyday.
To convert this to a custom connector definition the GUID of the user account in the URL needs to be replaced with a parameter, note the curly brackets and looks like the below
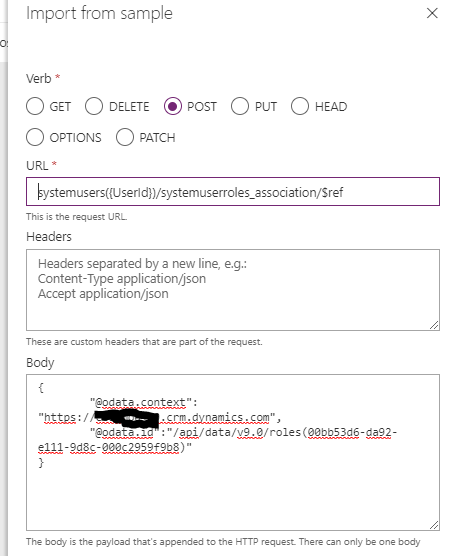
In PowerApps, after refreshing the connector, there is a new method on our connector. On click of the + in the Add role screen, this is called.
| |
Even though the second parameter has been hidden and given a default value in the connector, it still prompts to be entered. Not sure why.
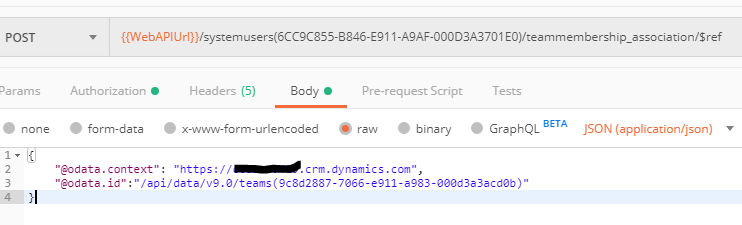
The Teams addition is the same logic, but a different connecting entity. The postman for this is below
Deleting a Role
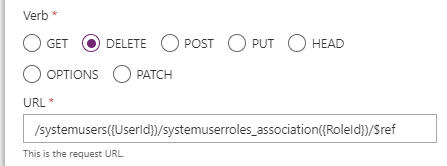
To complete the circle, a manager should be able to delete a role or team that the user belongs to. This is again done via a custom connector, the postman is below

As with the create definition, the 2 guids in the url need to be swapped out so the definition is created like this
Once refreshed in PowerApps, this is connected to the remove button on the Roles grid.
| |
After this call, the grids are refreshed to show the action has taken effect.
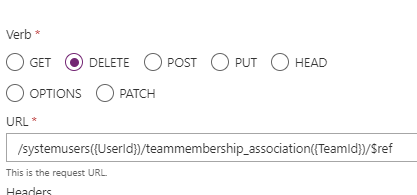
Teams works in the same way, using the url like this
And that is it! This app works well to bridge the gap for onboarding users in a busy enterprise, especially as a PowerApp, it is available to users on the go.
Custom Connectors really bring the availability of all the standard Customer Engagement functionality to the “citizen developer”. As enterprise level organisations get on board with PowerApps, small apps that make the employee experience easier will become necessary. This is only an example of how this could be done. Reach out if you would like me to share the app with you.