
So, after notifying the user that there is a new employee in their team, the manager needs to be able to update the data.
Objectives
- The Scenario (Part 1)
- Notifying the manager of a new Employee (Part 1)
- PowerApp to display and update User Data (This Part)
- Update Roles and Teams
My Reports
I am not going to go through how to create a PowerApp, there are numerous blogs and pages that step you through this, may I recommend the Microsoft page with it all on?
My PowerApp is pretty straight forward at the start. The first screen is to retrieve all the users that the current logged in user manages, connected to a User data source in the CDS.
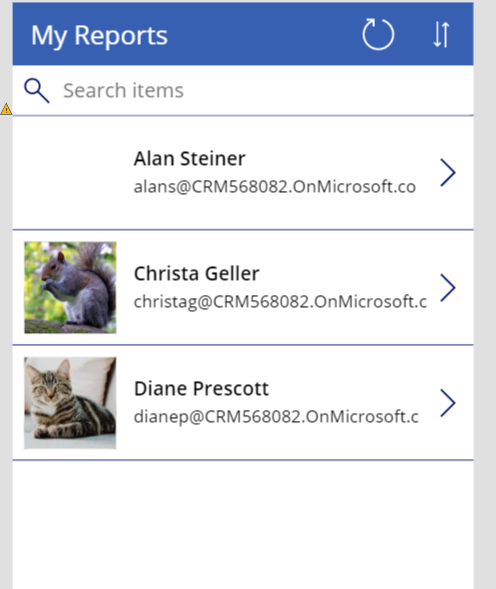
Start with a new List form, connect it to your CDS User data set and select a few fields. With the List form, there are several parts that you need to configure, to make the buttons at the top of the screen to work correctly.
Firstly, the Items property needs to be configured to correctly display and filter the data according to the search the user has selected and the sort.
| |
The core to this is the Filter, where the Users (the data source) is filtered to only show those where the email address of the manager of the user is the current users email address.
| |
Wrapped around this is functionality to sort and search this grid.
BTW, the picture is the ‘Entity Image’ field in the data set, the picture that a user can upload into D365 against their user account.
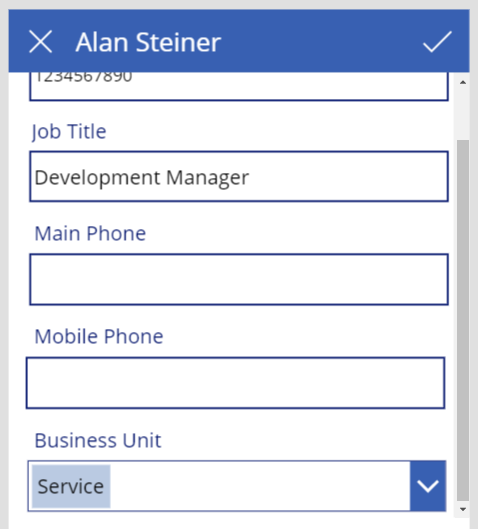
User Details
The next screen is a standard edit form, navigated to via the little arrow with this logic
| |
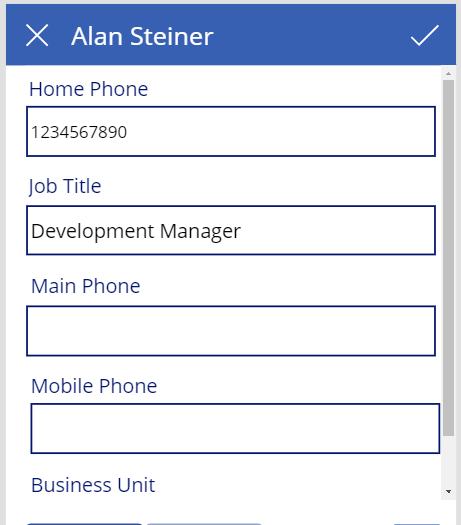
The form again connects to the User data set, with the item in the edit portion being the significant bit

I have just selected some random fields to display here, where I think it would be appropriate to manage. The Business Unit is a key field for a user, and is a selection and needs a little help to display the right data and update the record appropriately.
Start by adding the field. If you select the datacardvalue control (the drop down itself in the form), notice that a couple of things are wrong.
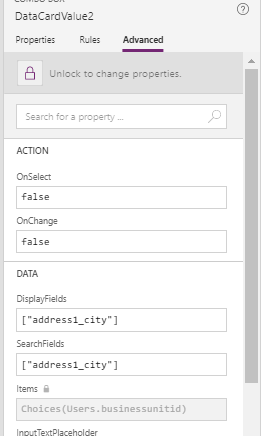
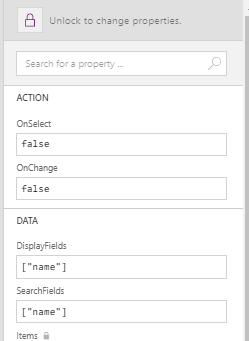
Business Unit is a parent of User, a relationship Lookup, and PowerApps has decided (not sure why, the default for lookups surely should be the name field, which is how D365 works) to select the Address1_City field to display to the user when they are selecting. Change this to “name”. Change the search as well to match.
Now, the form will display the BU of the user as well as allowing an update of this field.
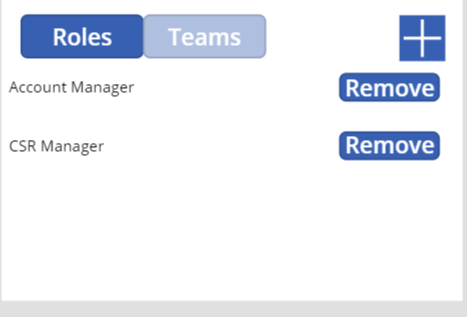
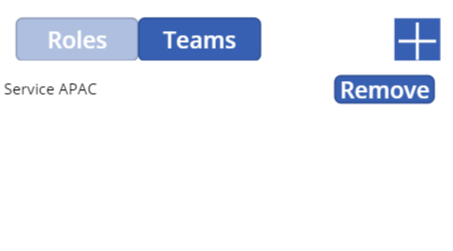
Displaying Security Roles
At the bottom of the edit form are 2 grids to display the users security roles and their teams. Both operate in the same way.
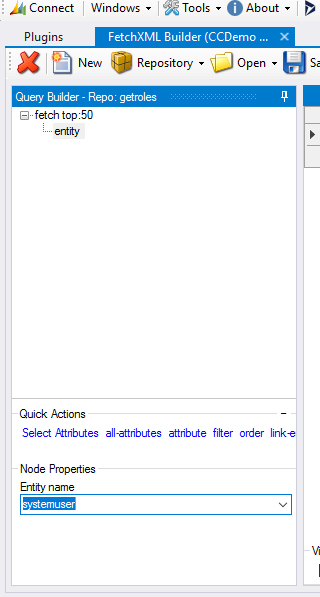
To get at the roles for a user, you have to use a bit of FetchXML. There is a hidden link table, or a collection value navigation, systemuserroles_association, which links a role with a user.
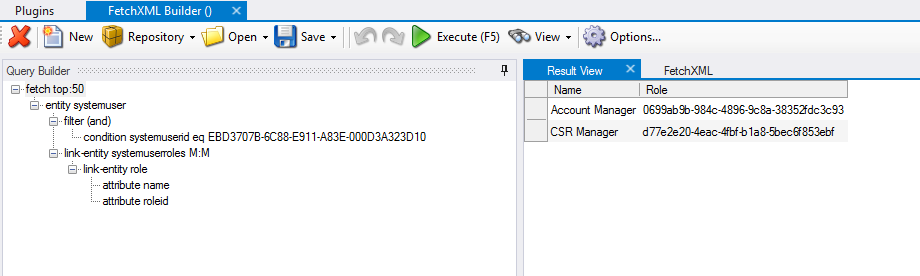
If you are using any sort of FetchXML, FetchXML Builder (FXB) by Jonas Rapp is essential. It allows a developer to define the exact fields, the connections and filters to form a query for data by looking at the data model. Start with a blank query, select the systemuser entity.
In our scenario, the query should return the roles for one user, the one that has been selected by the manager. Add a filter, then a condition, select the systemuserroles entity, and the systemuserid attribute (field). The operator is equals and the value is the GUID of the user account.
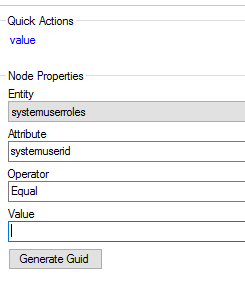
To test the query, paste in the GUID of the user. Another great tool is the Chrome Addon, Level Up for Dynamics by Natraj Yegnaraman allows you to quickly get to the GUID of any record, as well as some other useful tools (please don’t tell an end user about God Mode). The query should retrieve all the fields on the User entity for the chosen user.
Next, select a link-entity, namely the many to many systemuserroles.systemuserid -> systemuserid.
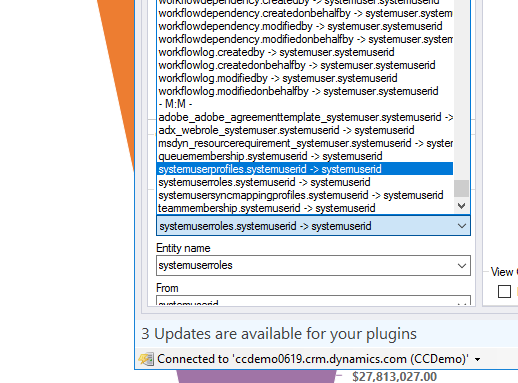
Executing this query will result in a lot of fields been returned, most of no interest to our query, so add some attributes, which limits the fields returned. Only interested in the roleId and the name.
Hit execute this time and this will display the roles that are associated with the user selected.
This is all well and good, but how is this data getting into the PowerApp? A custom connector of course. I have used custom connectors a lot to get at the bits the standard CDS connector can’t in my other posts. I won’t discuss how to create the connector, my post on LUIS covers that. I expand on it fixing the bug on creating attachments in D365.
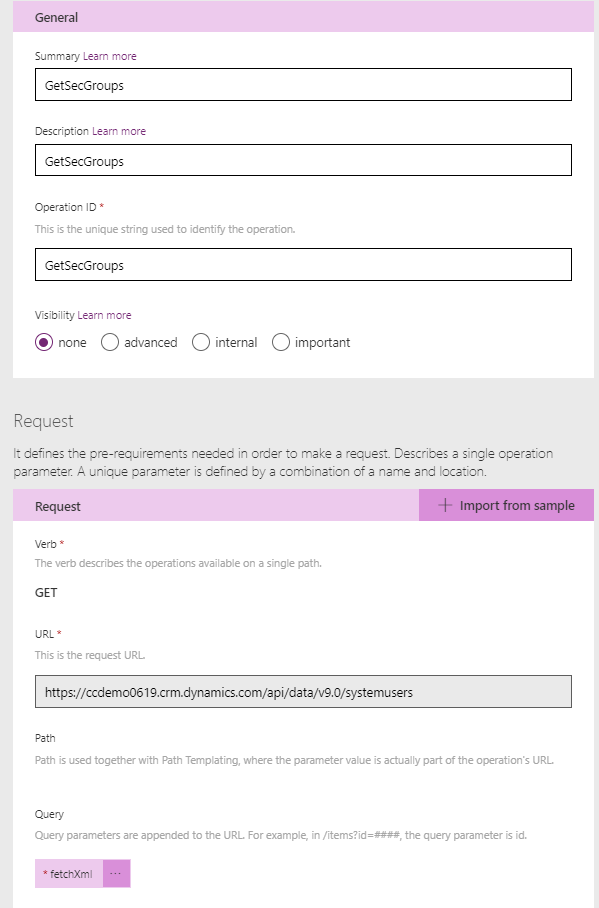
Creating the Connector Definition
Again, Postman is your friend here. Each of the main entities will accept FetchXML as a parameter, as in this is what is created in Postman
| |
Paste this into a new connector action and PowerApps will convert the fetchXML as a new parameter for the action.
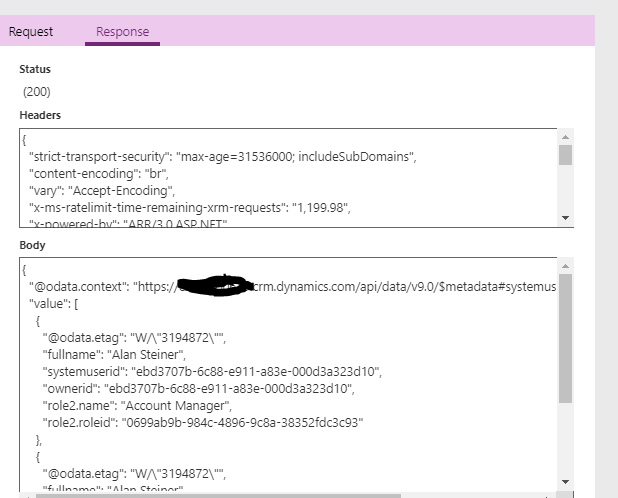
Test this action with a copy and paste of the XML that you generated in FetchXML Builder and the action will return a bit of XML itself
Using the Connector in the app
Add the custom connector as a Data source in the App.
To call the connector, on the OnVisible of the Employee Edit form, generate the XML first. Set a variable to the XML generated from FXB, substituing the current selected user id as appropriate
| |
MyReports is the list on the first screen, Selected is the user that the manager has selected. PowerApps converts the User to the GUID of the user (handy). Be careful with the quotes here, I found when pasting, curly versions of the straight quotes came in ( “ rather than “) which took me a while to resolve. Also, ensure all the double quotes are present. FXB provides single quotes and hence you need to double up for PowerApps to infer an actual quote rather than the end of the string.
Update: Thanks to Jonas Rapp for reaching out on Twitter to put me right. In FXB there is a setting to use single quotes rather than double in the rendered XML
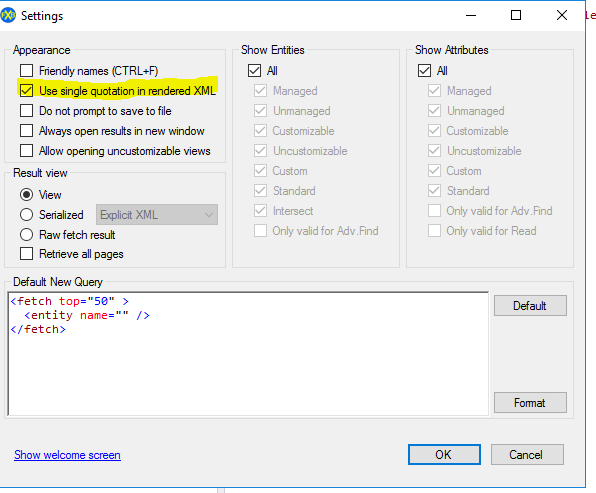
This then allows a straight copy / paste into your PowerApp
Set(
secString,"
After the string is created, pass this to the custom connector, inserting the return into a collection. This is the collection that is shown in the grid.
| |
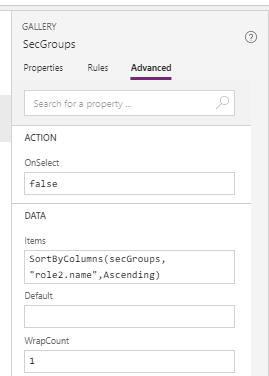
Put a gallery on the form, and use this collection as its items list, and sorted by the role just for usability.
The Teams grid is populated very much the same. The connector is based around the teams entity rather than the system user (in hindsight, I should have based the roles one of roles, rather than user, but achieves the same result, and it is all about learning isn’t it?). The XML looks like this.
| |
teammembership is the connecting table.
So, that is enough for now, the app displays users that report to me, I can see their teams and roles. Next post will show how the teams and roles are updated.