
In my previous post, the fact that I had to “fudge” the routing and closure of the case irked me. Whilst at D365 EU Summit in Amsterdam, I spent an hour listening to Serge Luca (his excellent blog is here). He inspired me to think that we could close this loop using a Custom Connector in Flow connected to our D365 instance, allowing an API call directly to the closure action.
Back in the UK, I did some digging, found another excellent blog from Andrew Butenko which steps through doing this for Won Opportunity here, so just to complete the circle I will step through how I did this.
Create the App in Azure
This is a bit heavy for a citizen developer & in the real world you will have to ask your O365 admin to do this, but in my trail I have the appropriate access.
Go to portal.azure.com & log in using your CRM Admin credentials.
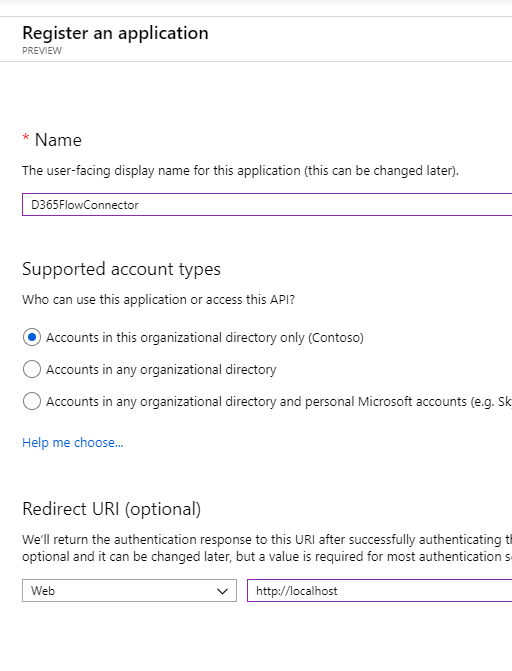
In the left pane, select Azure Active Directory, then App Registrations (Preview) then New registration. Give it a name, select Accounts in this organizational directory only & enter localhost as a temporary redirect URL, this will change later. Select Register & allow Azure to do it’s stuff
On the next screen, select API Permissions, then Add a permission
The one we are interested in is Dynamics CRM. Select it.
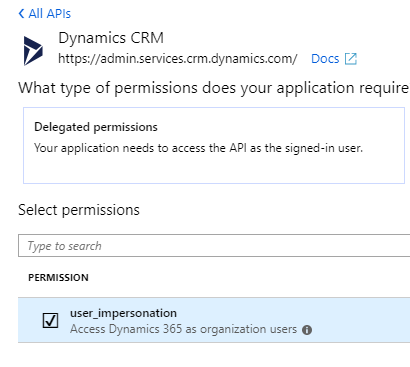
Check the box next to user_impersonation. Select Add permissions & now you should have 2 permissions for your new application. Now we need to ensure only we can access it.
In Certificates & secrets, select New client secret. Give it a Description and decide how long you want to wait before it expires. Not an issue for our demo, our trial wont last as long as this expiry. Once created, make sure you copy the value information, you won’t be able to retrieve this at a later stage.

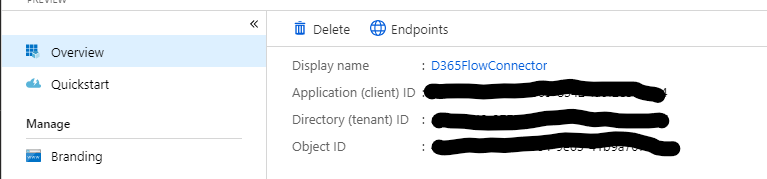
We also need the application id, this is available on the Overview tab
Create a Custom Connector
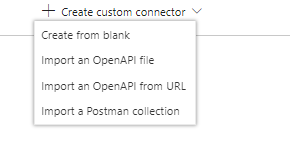
Back in flow, under Data & then Custom Connectors there is a Create custom connector drop down, select Create from blank and give it a name.
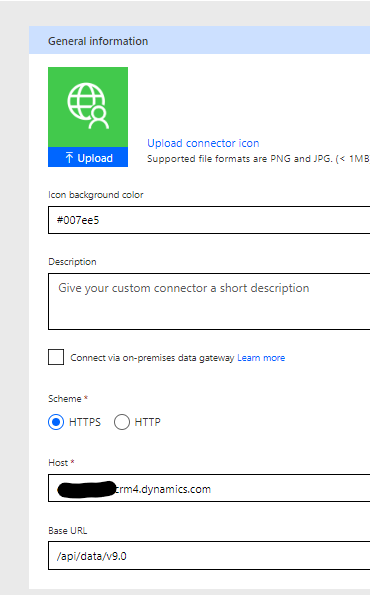
On the next screen, you can customise the description & logo if you want, but the important bit is the Host, which is your instance url, and the Base URL which is the api access path.
Select Security next & choose OAuth 2.0. Identity Provider should be Azure Active Directory, Client Id is the Application Id from previous & Client Secret is also from the previous step. Login URL, Tenant ID & Scope should be left to their default. Resource URL is the url to your environment.
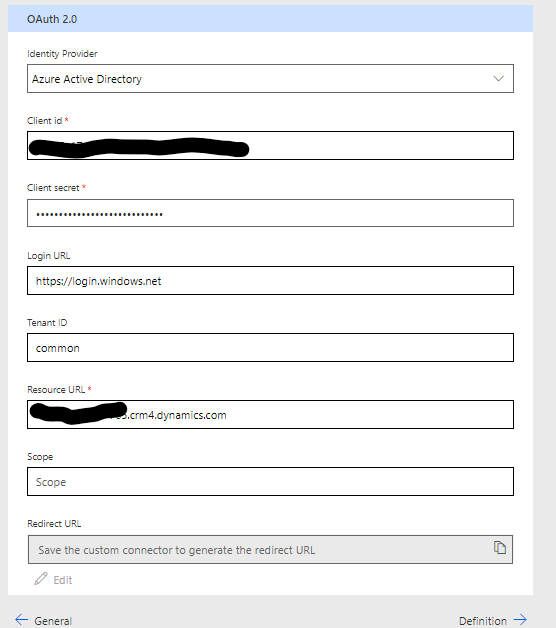
Save the connector by using the Update Connector now. There is an important piece of information, the Redirect URL, which we have to copy & add to our connector back in Azure.
Select the App Registration in Azure, select Redirect URIs

Add a new one from your copied redirect (I think it is standard, as I have only seen one, but just to be sure)

The next screen allows you to add Actions & triggers. I think there could be a whole new blog post on using triggers this way. As custom connector is generic across all apis, the flexibility is great. Select New Action.
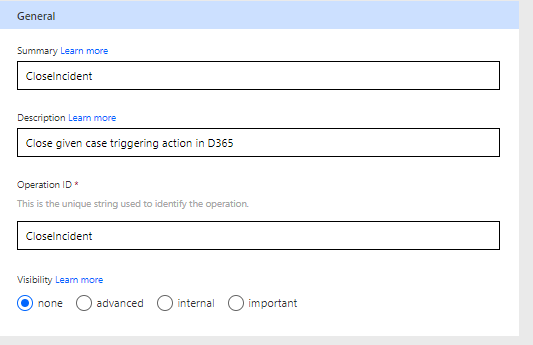
The General section describes the connector in Flow, so useful but nothing special is required apart from the Operation Id, which is what api action you want to call & must be unique within each connector.
Select Import from sample. This would usually be a sample JSON function. I built mine using Postman, and this is a bit more than a citizen developer would be able to handle without experience. Federico Jousset has a great blog post on using Postman to “play” with D365 end points, including a link to an extensive Postman collection with lots of examples which were the key to understanding the call, particularly the parameters.
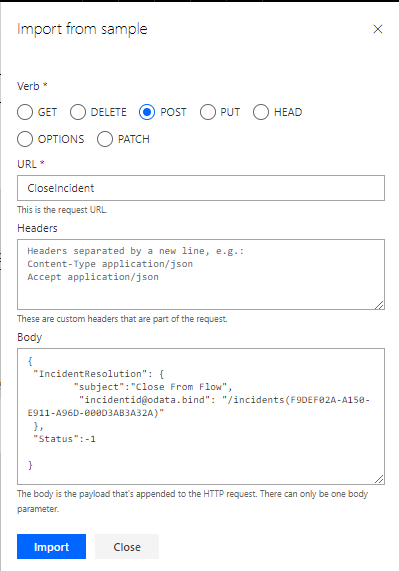
When you hit import, you will get this section under Request. The bit we are interested in is at the bottom, the body.

Click on body, then edit you will see a list of the parameters that Flow inferred from the sample body we gave it.
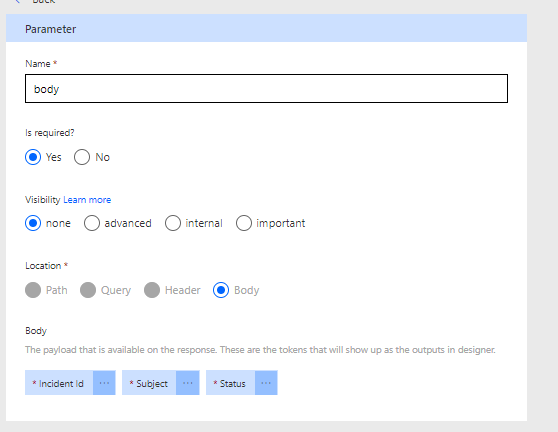
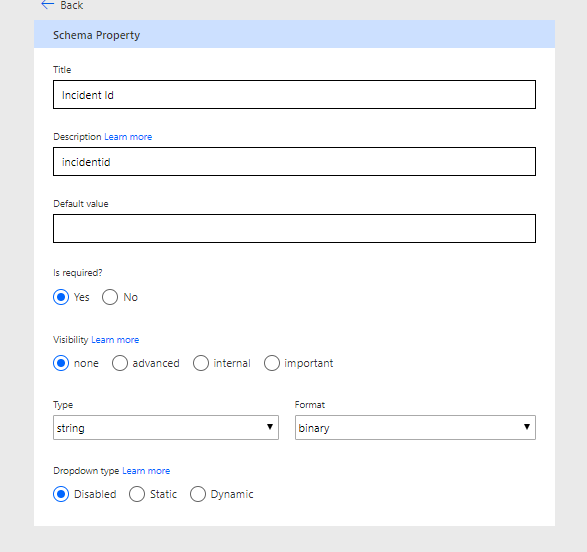
Select Incident Id for example, we can now give it a little more information & more importantly give the end user of the low more information with the Title & default value & whether it is required
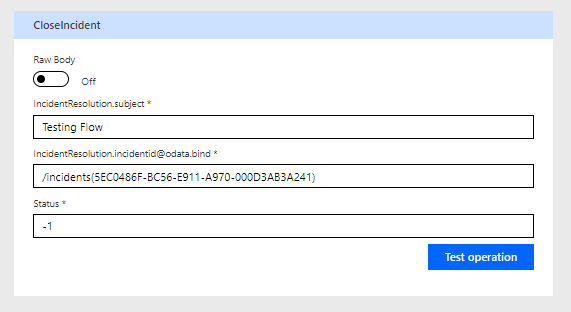
We are now ready to Test. Select the test button, choose New Connection & connect to your D365 system. Enter the appropriate values, but be careful over the incident Id, as it is expecting a odata conversion. Someone better at connectors could tell me why.
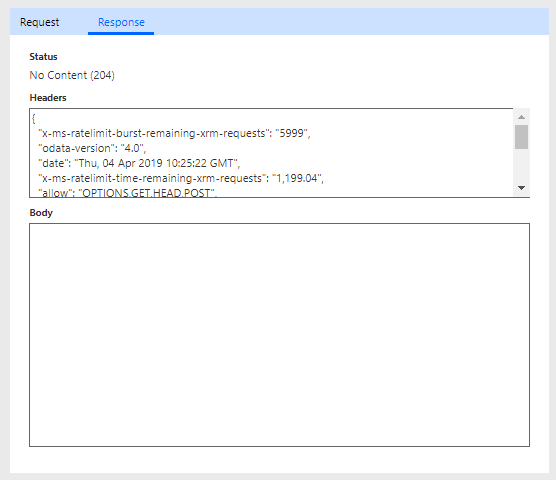
If everything is good, you will get a blank body response back, as this is how the CloseIncident works
Using the connector in Flow
In the previous article, I showed you how we had to use a custom field & workflow in D365 to close the incident. I can now replace that with my custom connector call
Where I was updating a record because they were asking for their next bill, I remove the change to the CloseByFlow field and replace it with a seperate call
In Flow, I add a new action, select the Custom Tab, my connector & the action I want, this case the CloseIncident. We need to mimic how the api is expceting the Case Id to be passed, which is why we send with the ‘/incidents(’ prefix & ‘)’ suffix.

Test the flow & we have now completed the scenario. Case closure is now part of the flow.
Custom connectors are new for Flow & give the Flow creator that step extra of functionality where the OOTB solutions don’t work.
There is a word of caution about licensing here, I have been using a trial of E5, which gives you Flow for Office 365 License. I can create a custom connector to a standard application but not a custom application with it. This is the same for Flow for Dynamics 365, so I don’t need an extra license, but be warned.