Continuing on a walkthrough of creating a more effective adaptive card for approvals, this part will describe the flow I created to generate the card as well as complete the action in D365 depending on the response
Objectives
- The Scenario (Part 1)
- Preventing progress of an Opportunity ( Part 1 )
- Using Flow to create a basic Approval ( Part 1 )
- Creating an Adaptive Card ( Part 1 )
- Using Flow to create the Approval (This Part)
- Updating the Opportunity (This Part)
Starting out
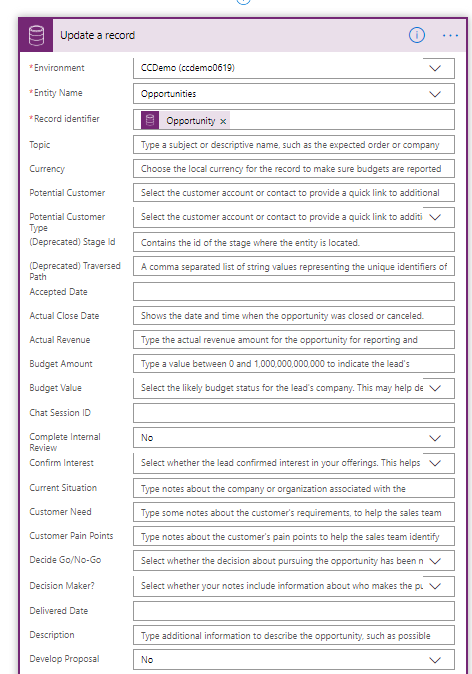
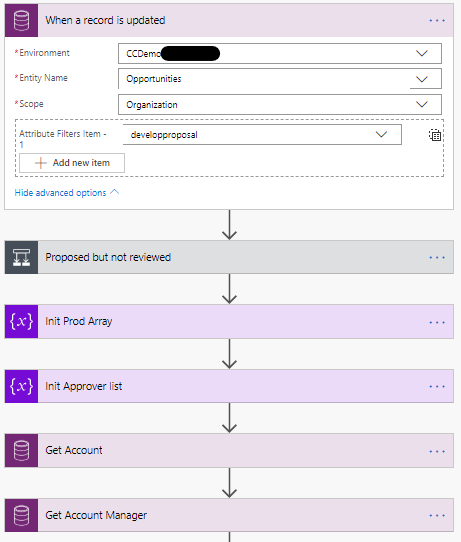
As previously described, the Flow is triggered when a user updates the Develop Propsal checkbox. In the first stages, the flow also retrieves some records that are needed later on for population of the card. There are also initialisations of 2 arrays that are used to populate the approvers and product lines on the card.
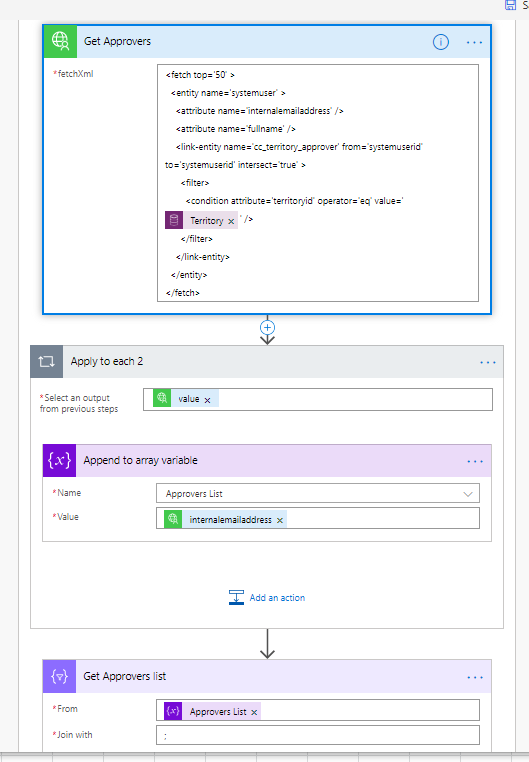
The next section is used to retrieve the approvers for the territory. In part 1, a many to many relationship was added, linking User to Territory via the territory approvers table.
As the territory approvers table is a many to many relationship, it does not appear as a standard table in the common data service connector, nor the D365 connector. There are various blog posts out there which state you can just use a custom value, naming the table, but I couldn’t get it working, so I fell back to my custom connector.
In my previous post on Security roles via a PowerApp, the custom connector which allows an FetchXML string to be sent against an object is used a lot to get the teams and the roles for a user. This connector is again used to find the users associated with a territory via the new relationship. The FetchXML is below.
| |
This will return JSON which corresponds to the users linked as approvers to the territory.
| |
An approval needs a list of email addresses, separated with a ; . To achieve this, firstly put each of the returned email addresses in an array, then use the Join function to create the string used for approvers
Populated the Main approval
The next part the body of the approval that is going to be sent. I’ll link the full version of this at the end of the article, but effectively, you copy your design, remembering to insert appropriate dynamic content on the way.
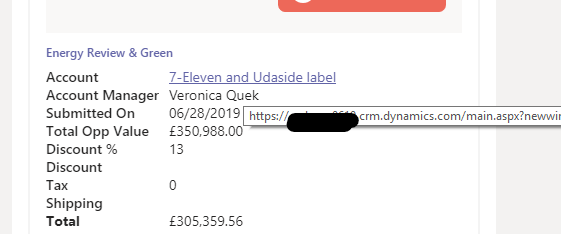
Here, I create the 2 URLs that are displayed in the card, which combine the starting point of url and append Account or Opportunity Id.
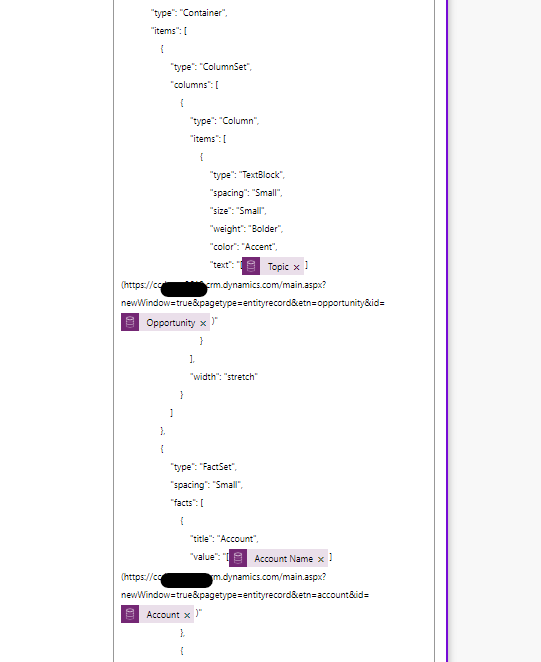
This is displayed at the top of the card.
Further, formatting currencies is difficult in Flow. (I stand to be corrected). I found this post on Power Platform community which highlights the issue and degvalentine has the solution, which I have tweaked to take into account of null values in the fields in D365. This example is for one of the fields on the secondary grid.
| |
Populating Product details
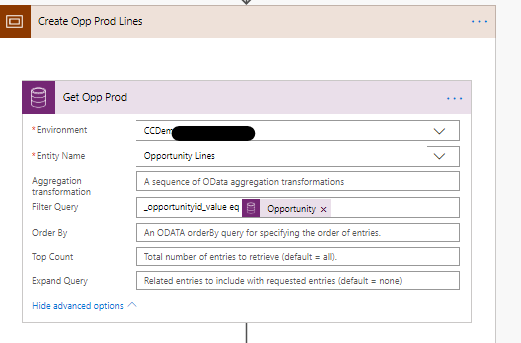
As the approval body is built up, the next stage is to create a table with the product lines in it. Getting the lines is a simple filter query using the primary key on Opportunity.
Like with the approvers, an array is populated with a formatted version of each line, taking fields returned and combining them with formatting rules.
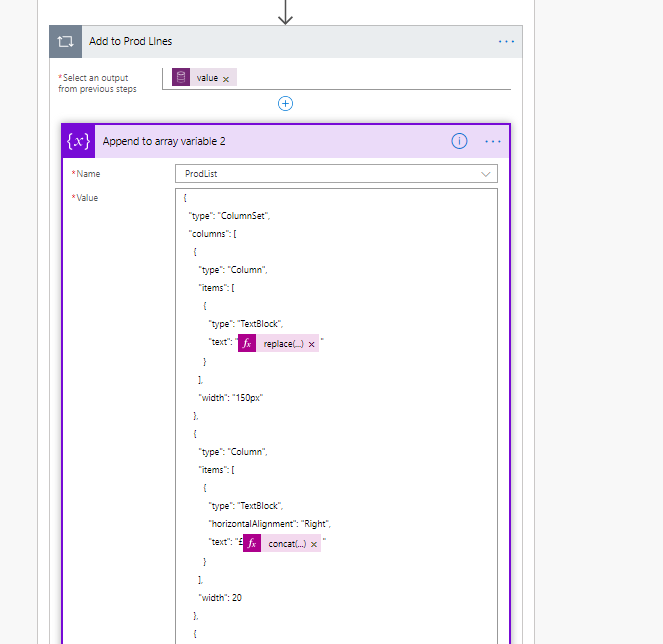
The first expression deals with the fact one of the products chosen to demo had a double quote (") in it, which messes up JSON if it isn’t escaped as it is the string delimiter. I used a simple replace expression to add a “\” before it.
| |
The next expression is the one above to format the currency with the appropriate commas and decimal places.
The output of this looping of the product lines is then combined using a join again, then combined with the body main string.
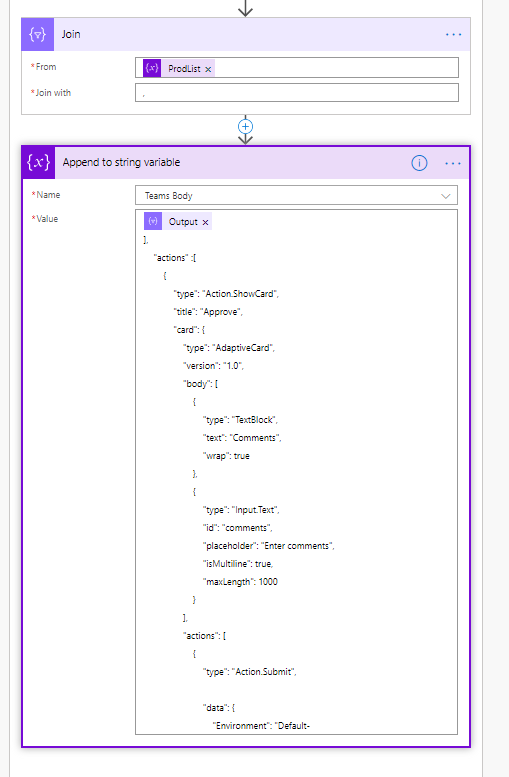
The bottom of this string starts the list of actions, which are the buttons.
The next step is to create the Approval. This is pretty simple, using a first to respond type, and fleshing it out a bit, so if a user uses the standard Flow Approval interface, they have something to relate to. No notification is needed, this will send an email to the approver, but the Flow will alert the approver via Teams.
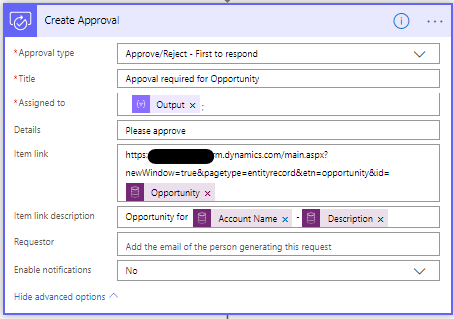
My original design for this PoC was to push this notification / approval to a Team channel, one notice to the Approvers channel. As Teams integrates with D365, it did not seem much of a hop to highlight the Opportunity approval.
The only issue is that approvals don’t work in team channels, only when sent to a user. Until this is resolved by MS, you are limited to sending the approval to an individual in Teams.
Sending the Approval
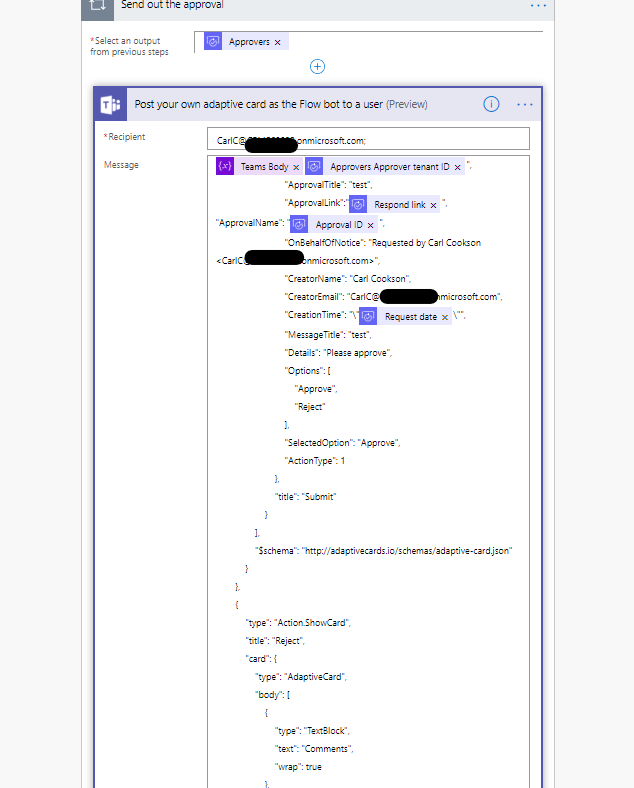
The key bits of this action is ensuring you have the Approvers tenant (can you post approvals across tenants?), the respond link, the approval ID and the creation time populated with the data coming from the approval. The same goes for the Reject action.
That’s it, the new approval is sent.
Waiting for the Approval
As the approval is configured that anyone could approve or reject, the next action is to wait for that approval to happen. Approvals can happen upto 30 days, which is another issue, but as this is to speed up the approval process, let’s not worry about that.
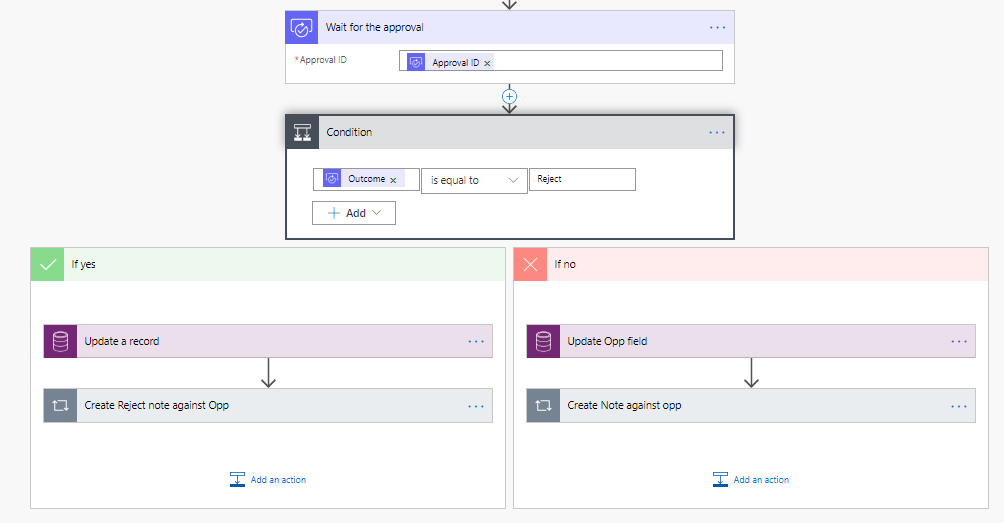
If the outcome is approved, then the field Complete Internal Review is checked and a note is created, linked to the Opportunity logging who approved it.
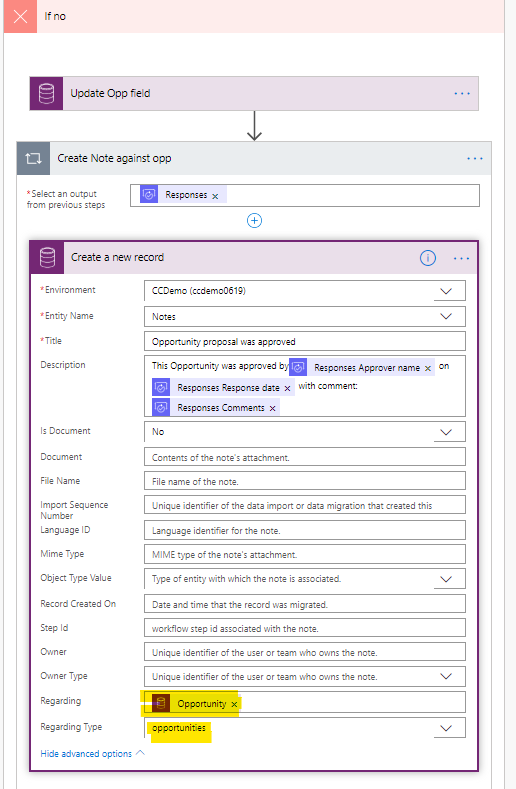
This is in a loop, as, in theory, there could be more than one approver on an approval, if you use the Approval setting that forces everyone to approve something.
The Regarding / Regarding type, highlighted above, need to be populated as you get orphan records and can spend 20 minutes wondering what is wrong (not me obviously)
On the Reject side of the condition, the Opportunity is put back to the state it was in before the flow started, namely Develop Proposal is reset. This triggers our Flow again, but as long as the first condition is met, it won’t go any further. A note is also added, to highlight who rejected it and why.