My blogging journey started with using LUIS, one of Microsoft’s Cognitive Services to automate case assignment. This blog goes into detail about how this all hung together, using a model defined in LUIS, calling the LUIS endpoint when a new cases are created and classifying the case, by the subject, with the result from the call.
After my summer break (sorry, but family etc comes first) I thought I would revisit this scenario, but using one of Microsoft’s shiny, new AI Builder capabilities, Text Classification AI Model.
Objectives
- The Scenario
- Training your Model
- Getting Data
- Publishing the Model
- Using the Tags
The Scenario
In my first blog, I went through the scenario, so not wanting to repeat myself, but for the lazy who don’t want to click through…..
Big Energy is a supplier of energy products to end users. They have a call centre which handles any query form the customer. As a perceived leader in the sector, it is always wiling to use the latest technology to allow users to interact with them, which reduces the pressure on the customer support centre.
Big Energy has a mail box configured to accept customer emails about anything and, rather than have a group of 1st line support employees filtering out and categorising the emails based on the content, want to use cognitive services to improve the process of getting the email (the generated case) to the right team.
Using AI to file the case
LUIS does a great job of this, with a BA providing sample utterances for the model and training it.
Text Classification AI Model does it slightly differently. The model expects users to provide data (in the CDS) in the form of text blocks and representative tags for the data. Both need to be in the same entity in CDS.
On a standard Case record, the classification or tag is the subject field. This is a parent record of Case and the tag would be the name of the subject. As subject and case are separate entities, the Text Classification AI model will not work. A field, be it a calculated one, has to be introduced to enable the classification AI to work. Adding data to an entity from a parent entity breaks my Third Normal Form training (anyone remember that? Is it still a thing?).
I have raised this issue as a new idea on the PowerApps ideas forum, go there and give it a vote!
The new logic for our AI model is that the AI will classify the incoming case, adding a tag. This will trigger a flow, changing the subject of the linked case accordingly. This will trigger re-routing of the case like it did in the original LUIS method.

Training your AI
With any AI model, it needs training. The AI needs to separate the wheat from the chaff. Creating a model is simple in PowerApps.
Start at make.powerapps.com and select AI Builder, then Build
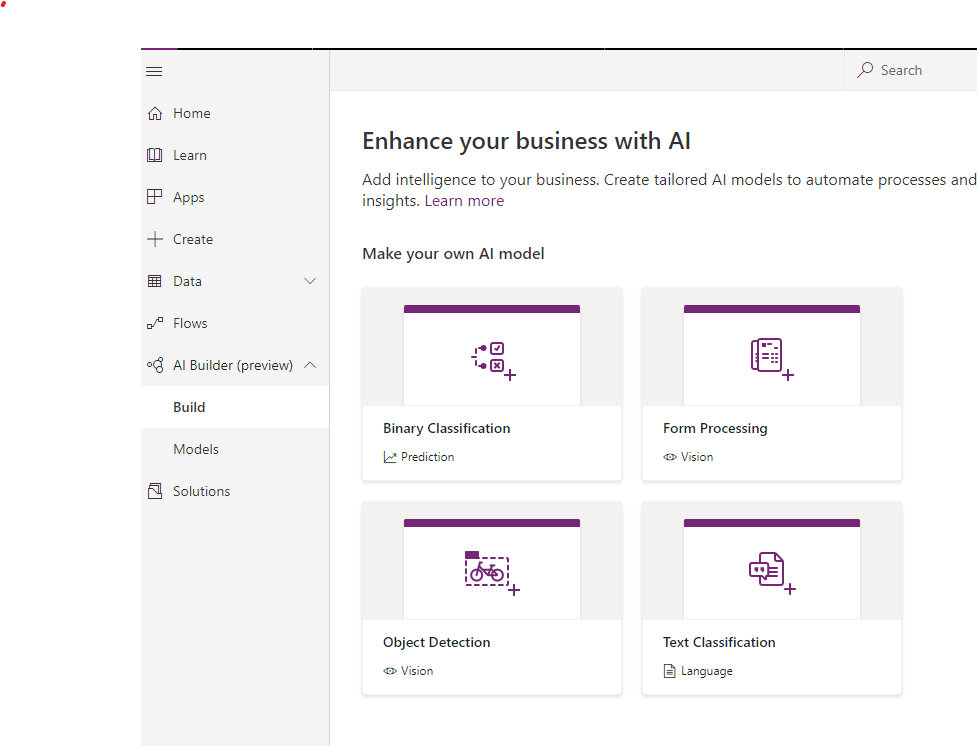
There are 4 options here
Binary Classification is useful to give a yes / no decision on whether data meets certain criteria. The criteria can be up to 55 fields on the same entity. For example, is a lead with a low current credit limit, high current account value, no kids but has a pink toe nail (shout out to Mark Christie) likely to get approved for a new loan?
Form processing is intended to assist users in automated scanned documents to prevent re-keying. An example would be any forms hand written as part of a sales or service process (before you convert to a PowerApp obviously).
Object detection assists in classification of items, be in types of drink, crisps or bikes, etc.
Text classification decides on a tag for a block of text, for example, a user could enter a review of a product online and text classification could understand what product it was for or whether it is a positive review.
All 4 of these have origins in the Cognitive services provided by Azure, LUIS being the big brother of Text Classification.
Ensure you are in the correct environment. Text Classification only works on data within your CDS environment, so don’t expect to reach out to your on-premise SQL server. There are ways to bring data into CDS, not in scope for this discussion.
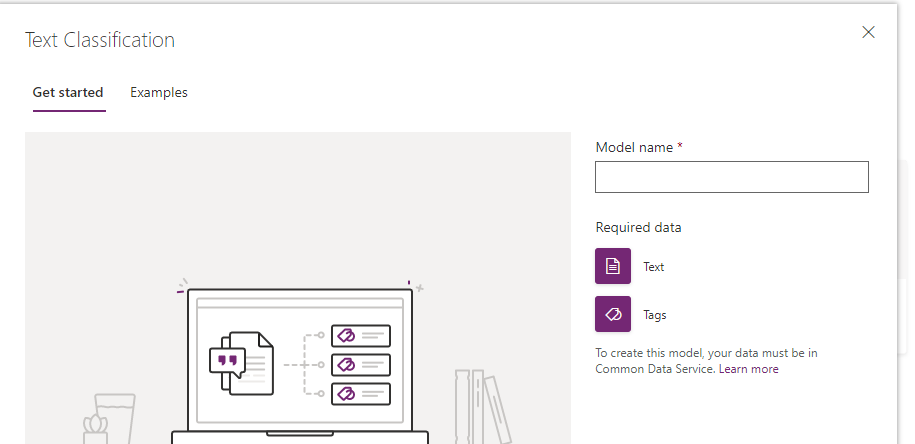
Selecting Text Classification displays a form to give you more understanding, and it is here that you name your model
Hit Create and then Select Text. This will list all your entities in your CDS environment (in my case, a D365 demo environment).

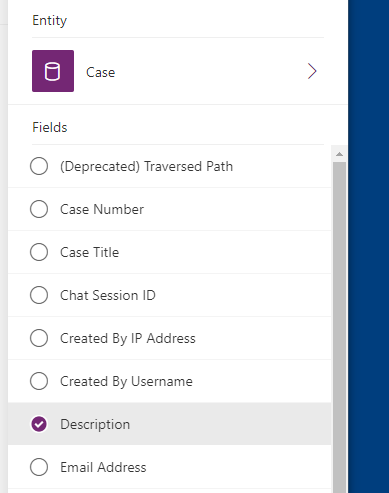
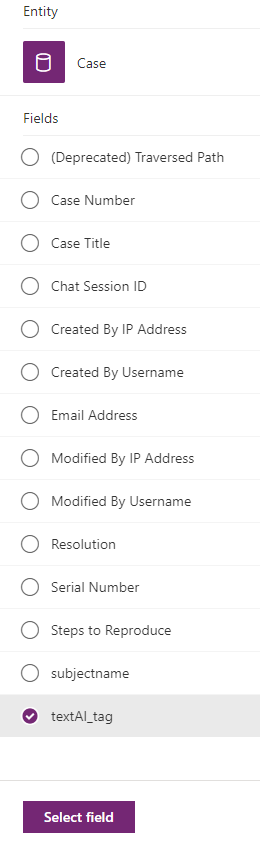
Select the entity you want, Case for our PoC.
The interface will then list all the fields suitable for the AI model, namely anything that is a text field. I chose the description field, which is typically the email that the user enters when emailing in a case to the support department.
Hit the Select Field button and it will present you with a preview of the data in that table.
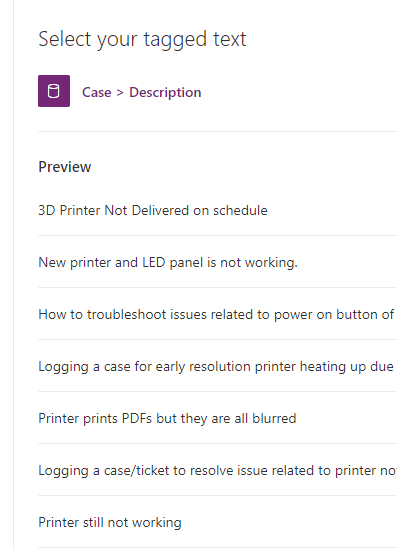
The next screen is to select your tags. This needs to be in the same table, and as already discussed, is a bit of a limitation to the AI builder. Less normalised data is more common in Canvas apps or SharePoint linked apps, but for structured data environments with relationships and normalised data this is a limitation that will hopefully be removed as Text Classification matures.
Also, option sets are not available, again another common categorisation technique. Multi-select option sets are an ideal tagging method too. Assume that this will come in time.
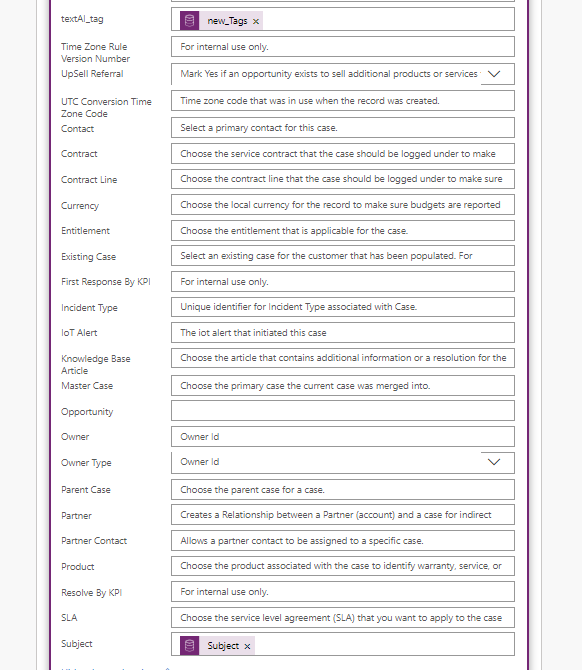
For my PoC, I created a new field, put it on the Case form and started filling it in for a few records.
Select the separator. If your tag field contains multiple tags, separated by a comma or semi-colon, this is where you configure it.

It also gives you a preview of what the tags the AI build would find using your chosen method. You can see in the No separator option, “printer; 3d” is one tag, rather than the assume 2 tags as displayed if semi-colon is selected. This depends on your data.
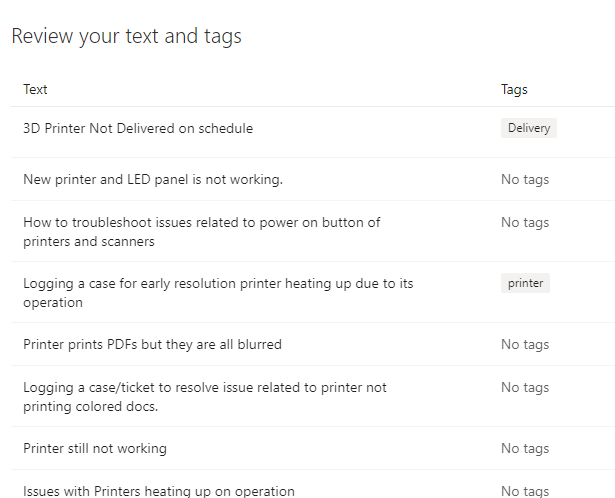
The next page displays a review for your data and the tags that the AI builder finds.
Next, select a language for the text field dependent on your data.
Once selected, train your model. This is where I started to run into problems. My initial population of tags was not enough. The training came back quickly with an error. There should be a minimum of 10 texts per tag, which I didn’t have. That would be hundreds of rows. How was I going to automate creating data to give the Text AI enough data to be a suitable demo?
Getting Data
I need thousands of records to train my model properly, thousands of records relevant to the tags I create. No online data creator seemed suitable, as it wasn’t specific enough, so how? A flow.
First I created a column in the Contact table to store a number for my contact, a unique no so I can randomise the selection of a contact.
Next, I need some data for the case description and the tags. This is already done as it is the same as the utterances and intents I used for LUIS, so I exported the LUIS configuration, put the data in an excel file & added a number to that.
Ready for the Flow
My simple flow is described below.
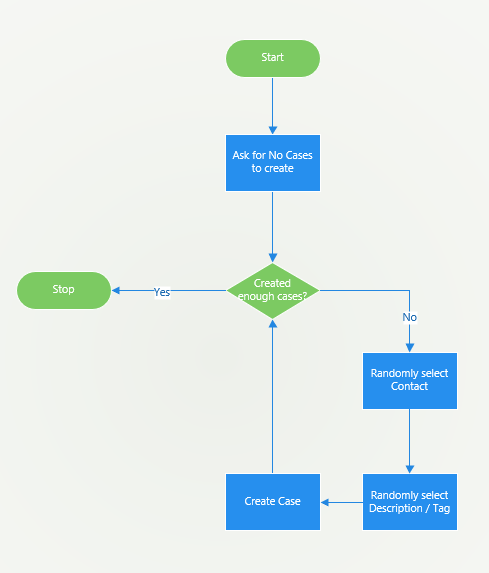
Ask for the number of cases to create, keep creating cases until you have reached that limit using a random contact and a random description.
This flow is triggered manually so I start with a manual trigger and also prompt for the number of cases to create,
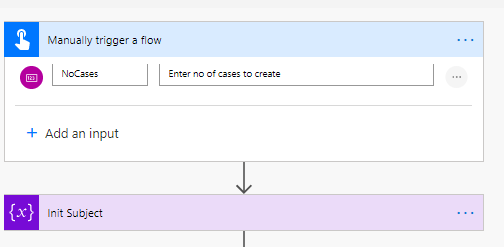
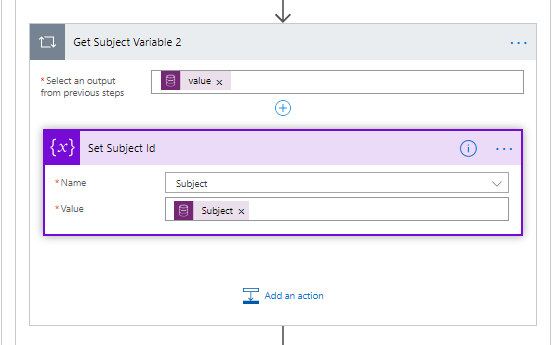
The Subject variable is used later to define the reference for the subject we have chosen.
The default for loops is 60. I realised late on in the day that you can change that, but breaking up loops is good practice, to limit the scope of what could go wrong, so created a loop within a loop structure for my flow.
I restrict the inner loop to 50 loops maximum, which means the number of times I run this loop has to be calculated. If I want a 920 cases created, my outer loop would occur 45 times, each creating 50 cases. I would then do a final set for the rest.
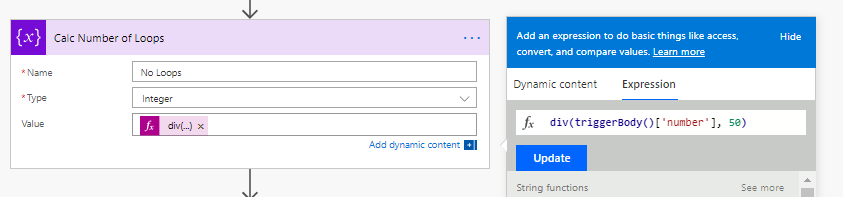
The next steps will initialise some counters used in the loops. I also want to ensure that if the user wants to create less than 50 records, the outer loop doesn’t run at all.
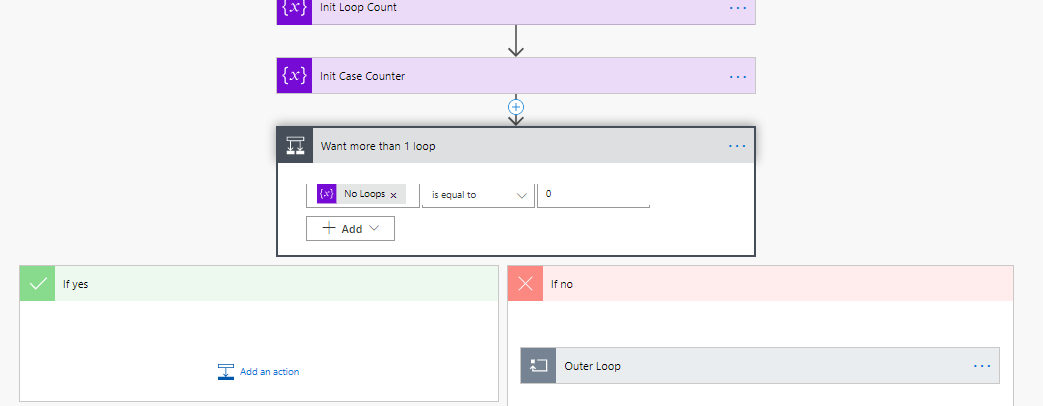
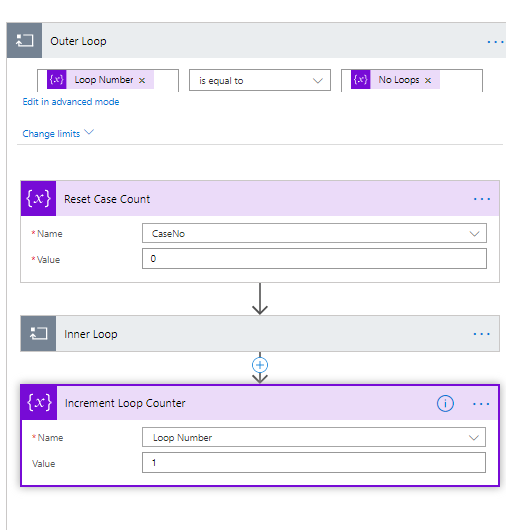
The outer loop will run for the number of loops I have calculated. This is the loop condition. The counter increments as the last thing in the outer loop. The first thing in my outer loop is to reset the case counter. This is the counter for the 0-50. If we are in this inner loop, at least 50 cases will be created.
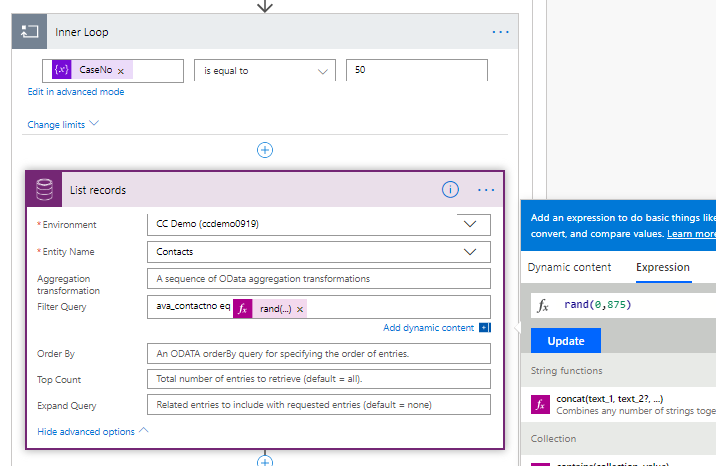
The first thing it does is get a random contact by using a odata filter to filter on the number field created specifically using a random number from 0-875 (875 being the highest number in that table).
Once the contact is retrieved, find a random description / tag combination. The data from the LUIS utterances is held in an Excel file on a Teams site. Again, a rand() function takes a random number up to the maximum in that file.
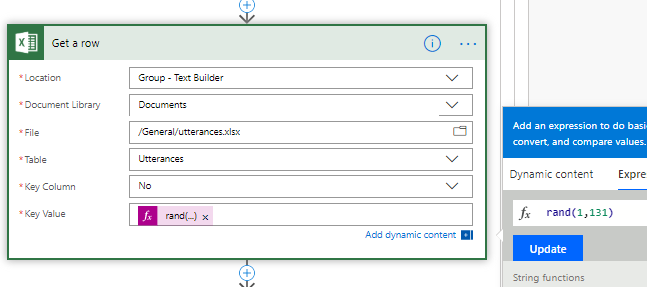
Because more than one subject row could be returned and the fact I don’t like apply to each inside each other, set the subject Id variable.
Ready to create a case now.
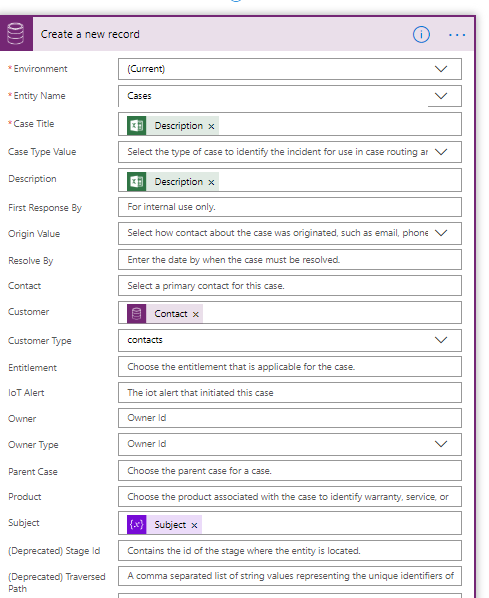
Nothing special. It also populates the tag field.

After some testing, to ensure that the case has the necessary fields entered, the flow was run for a thousand records without an issue.
Creating data this way isn’t quick, 20 mins for 1000 records, but it is easy and allows you to bring in reference data quickly. Superb for PoC environments.
Training your Model (with data)
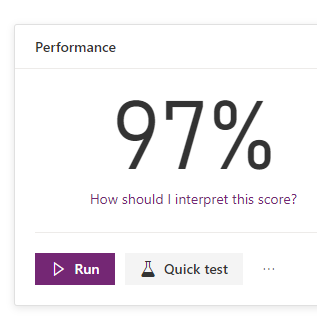
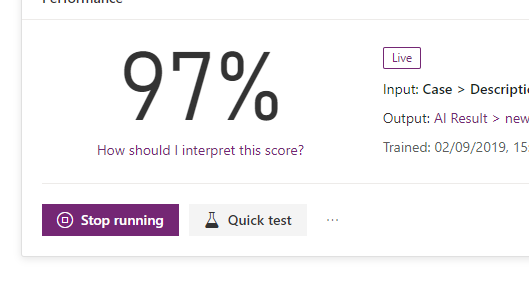
Once this data is generated, it was time to re-train my model. It ran through with success this time.
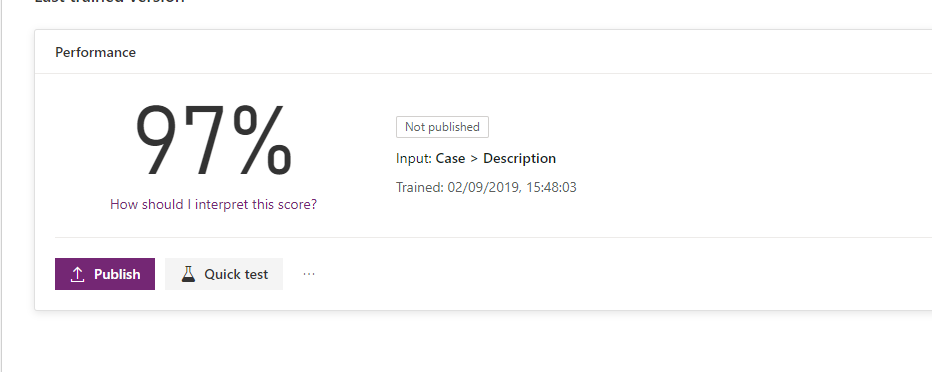
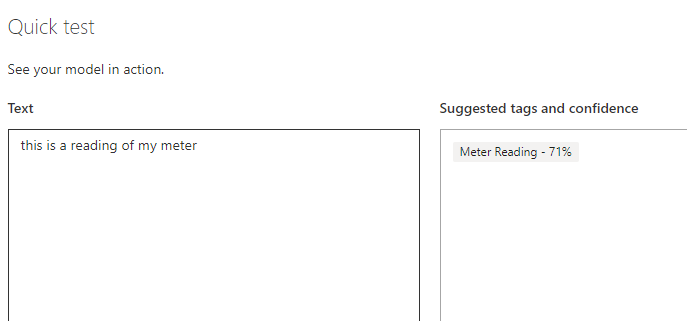
The model is 97% sure that whatever I throw at it, it should be able to match it against the tags. There is a quick test option here too, which allows entry of a sample phrase to check your model
All ready to publish.
Publishing your Model
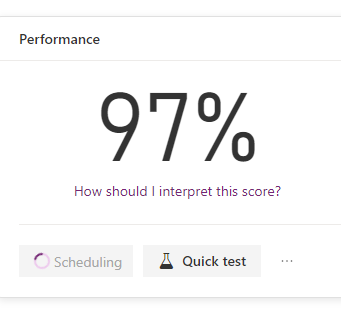
Publishing the model allows it be used within Flow and PowerApps.
Clicking Publish generates a child table of the entity you first chose where the predictions are stored. The documentation states the table will be TC_{model_name} but it created mine with gobbledegook.
The link on the form helpfully allows you to go straight to the entity in the new customisation interface, where you can change the label of the entity.
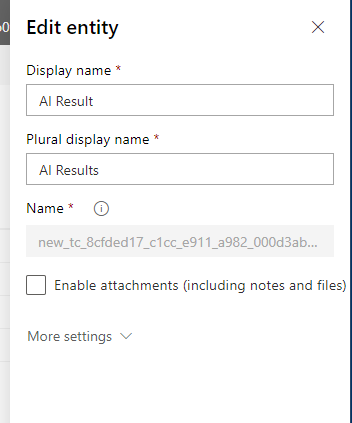
Also, it is useful to change some of the views, particularly the associated results view. By default it includes name & date, which is pretty useless, so add the tag and the probability.
As this is a child table of Case, it is by default visible in the case form Related navigation item. In the classic customisation interface, you can change the label of this view.
As it is published, users can use flow and the Predict action to predict the tag for a given section of text, useful if you want to do stuff before it reaches an environment.
Now that it is published, you need to allow the model to run. This means it runs every time there is a change to the text field. This is all done via Flow, so will use your flow runs. It stores the result in the new entity.
If a case is created now, it automatically creates the tag secondary record.
Using the tags
As AI builder generates a record for you with its prediction, and the data is in CDS, it is a simple Flow to utilise that. As it creates a record in the AI Tags table, update the corresponding case to change the subject accordingly.
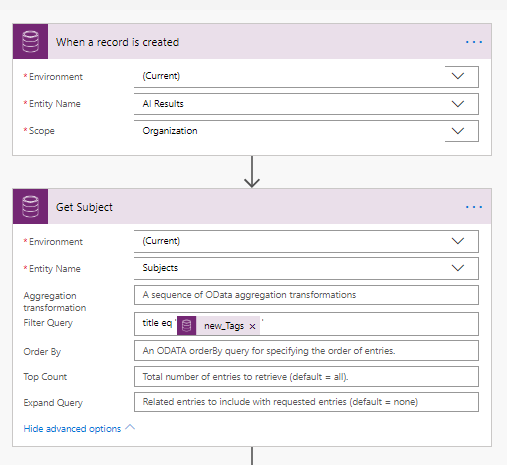
Simple trigger when a record is created. The first action is to find the subject from the tag.
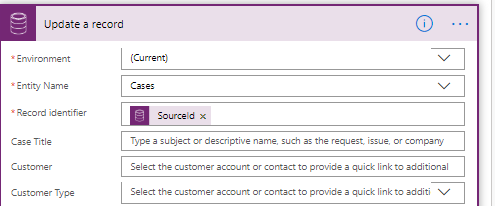
Update the case record with the subject and the tag so the AI can be retrained later.
That’s it. Replacing LUIS with a more user friendly environment is definitely a tick in the box for Microsoft. The AI in PowerApps feels like a simple, user friendly stepping stone for a lot of businesses into the AI world. Hopefully, businesses will embrace these simple models to leverage tools to shortcut processes, improving Employee and customer experiences.