D365 Customer Service and Field Service both use Calendars associated with resources to schedule working time. This is accessible via the resource calendar and typically relies on the individual working a set time frame each week. Fiona works Monday to Friday, 8-5.
When you are working with volunteers, this doesn’t work. Each volunteer will have an inconsistent schedule, with most of the time not being available. Rita has just volunteered for a couple of hours next Thursday.
A recent client project to improve their scheduling of resources and was definitely in the second scenario. It wanted volunteers to sign up for times using simple time entry on a portal and transfer these times to the scheduling board.
As Calendar is available as an entity, my initial thoughts that these would be a simple integration using Flow, unfortunately, not. This post details my findings and how I achieved creating sporadic “On Time” in Field Service or Customer Service.
All credit for this discovery goes Dave Bostock, my colleague at Avanade, but judicious use of F12. Thanks to Jason Almeida and Rob Dawson for their support and experience to nudge me to the solution.
TL;DR
How to create calendar entries in D365 for resources using an unbound action in Power Automate.
Manual configuration of Calendar Entities
Every bookable resource has a calendar associated with them. This Calendar has several rules which establish the working pattern for the resource. A rule, normally, would say “This resource works Monday to Friday, 9 to 5” or something similar.
From the Resource, you can get to a calendar view by selecting Show Work Hours, highlighted below. It may also be available as a tab on the main form, depending on whether you are using Field Service or not. For me, I am still using the Customer Service version.

Top left, you can alter the default rule for the user by adding a new weekly schedule, add an update to a single day or add time off for the resource.
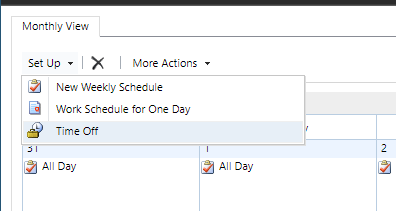
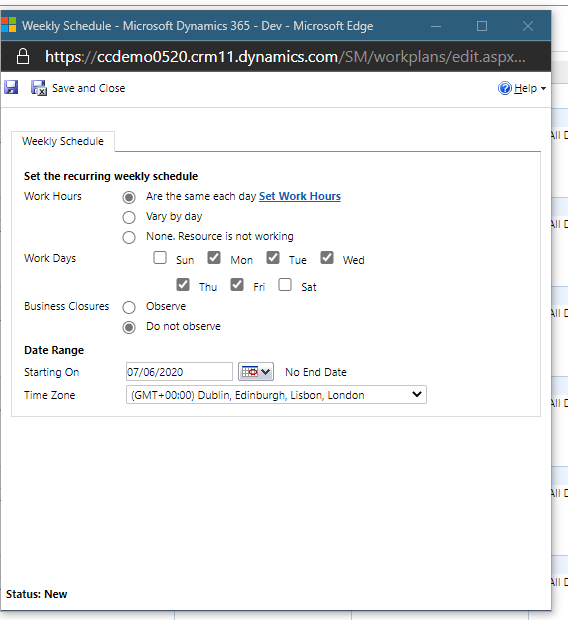
Selecting New Weekly Schedule and populating the next screen is the standard way resource get a weekly schedule.
For volunteer management, resource tends to have a blank calendar. This is done by deleting all the calendars associated with the resource. From there, a volunteer would sign up for periods or shifts. This, on the face of it, just sounds like data entry, easily achieved via Powe Automate.
Creating Rules via Power Automate
If you use either of the Common Data Service connectors to create a calendar rule, you will be presented with this error.
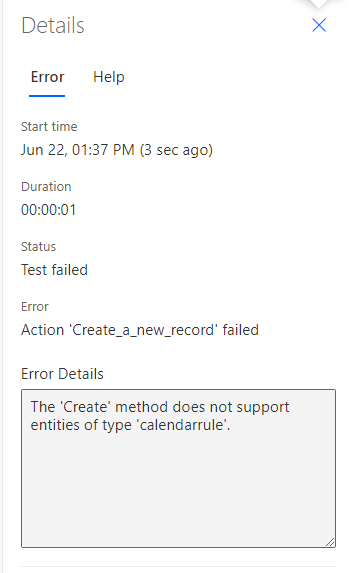
This is because calendarrule is not a real entity, rather it is an aggregate entity. You can not create or update them directly. The only way you will get around this is to use the unbound action, msdyn_SaveCalendar.
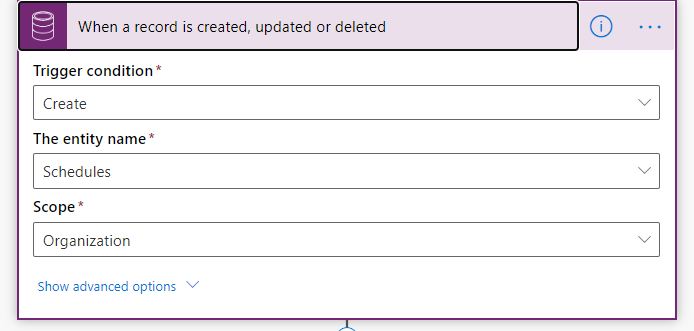
To demonstrate this, I have created a simple Schedule entity. This is a child of Contact, with 2 datetime fields, start and end. The premise is the Resource, via a portal, will be allowed to add to their schedule by signing up for predefined slots, but this will mean that there is a schedule for each contact.
When a schedule record is created, we need to create the corresponding CalendarRule to show that this resource is available in the calendars used for planning.
Next, retrieve the calendar for this resource. The schedule is linked to a Contact, so use the Id to find the Bookable Resource.
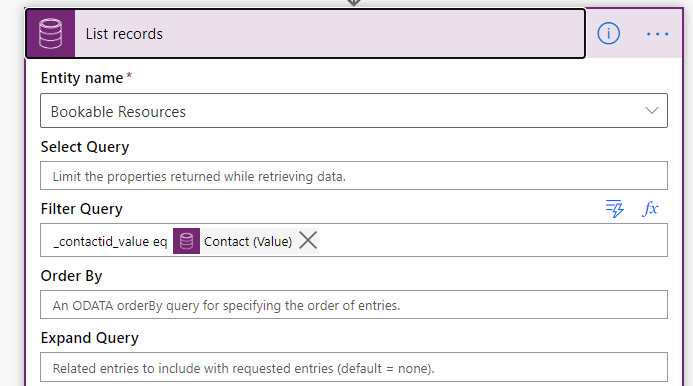
Finally, call the action. It is in a loop as the List records always returns 1 or more records.
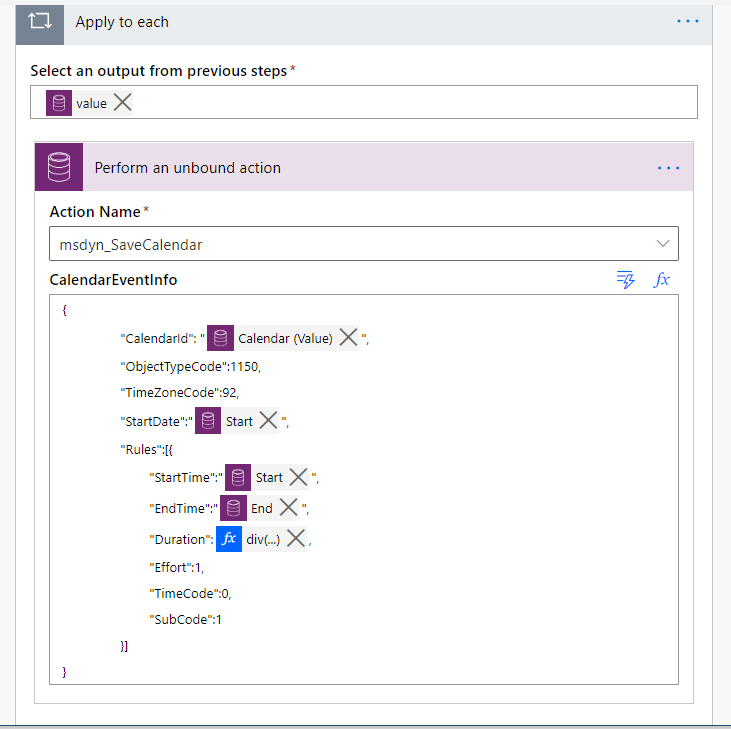
This is a JSON snippet, creating an object to add to the calendar.
CalendarId is the Resources calendar, ObjectTypeCode defines this as a Bookable resource, displayed here. TimeZoneCode is obvious, this points us to UTC. StartDate I have populated with the start of the schedule.
The next is a list of rules to add to this Calendar, you could create more than one here, but we don’t have to. Start and End time are taken directly from the Schedule record. Duration is the time in minutes for the scheduled appointment. This can be calculated by firstly converting both to ticks (seconds) and reconverting to minutes. I got this from an excellent response to a forum question here.
| |
Effort, timecode and subcode are required, defaulted to indicate a working period (timecode 0) and 100% effort (Effort 1).